


My 4-year-old is basically an art making machine these days and I love it! I’ve always tried to have some art projects going since she was little, but if you’ve attempted arts/crafts with a toddler or small kid then you know the attention span for it can be pretty hit or miss.
It seems, however, that she’s hit a sweet spot of really enjoying all the coloring and painting time we can throw at her at preschool or at home, and she’s starting taping up her projects all over the house as soon as she completes her creations.

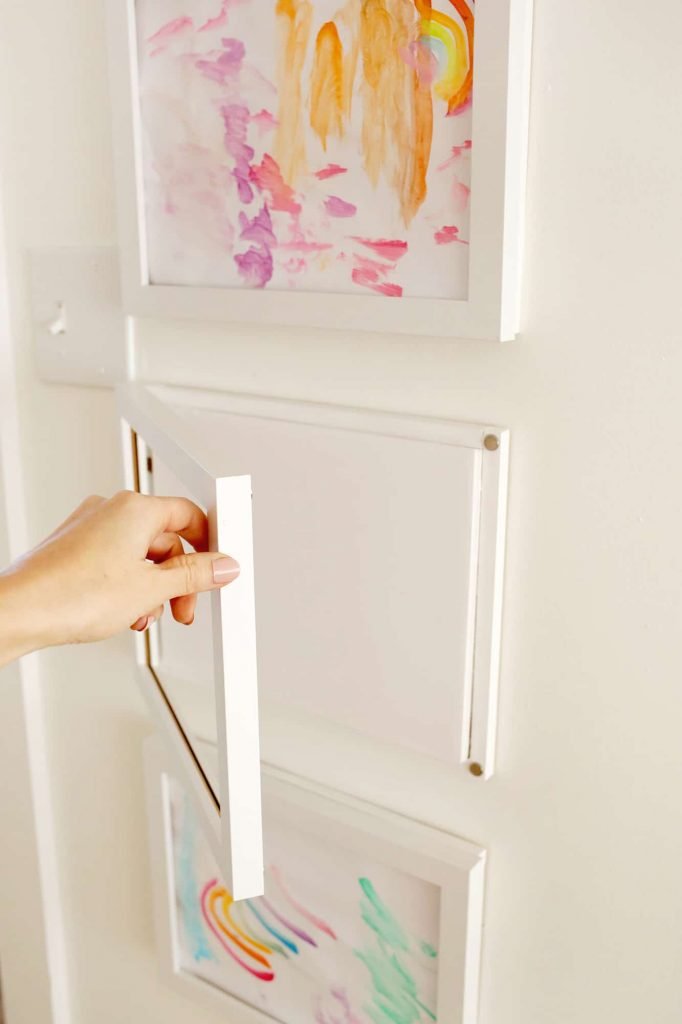
She’s also very insistent on her artwork being in our main living areas in the house, so I thought I would elevate the current “scotch tape” method by making her some frames that she can easily display her own artwork in (and switch them out herself with new ones) as she wants to.
Since these are open front frames, this kid’s art frame DIY accommodates more 3D artwork (think cotton ball clouds and whatnot) without smashing their masterpiece.
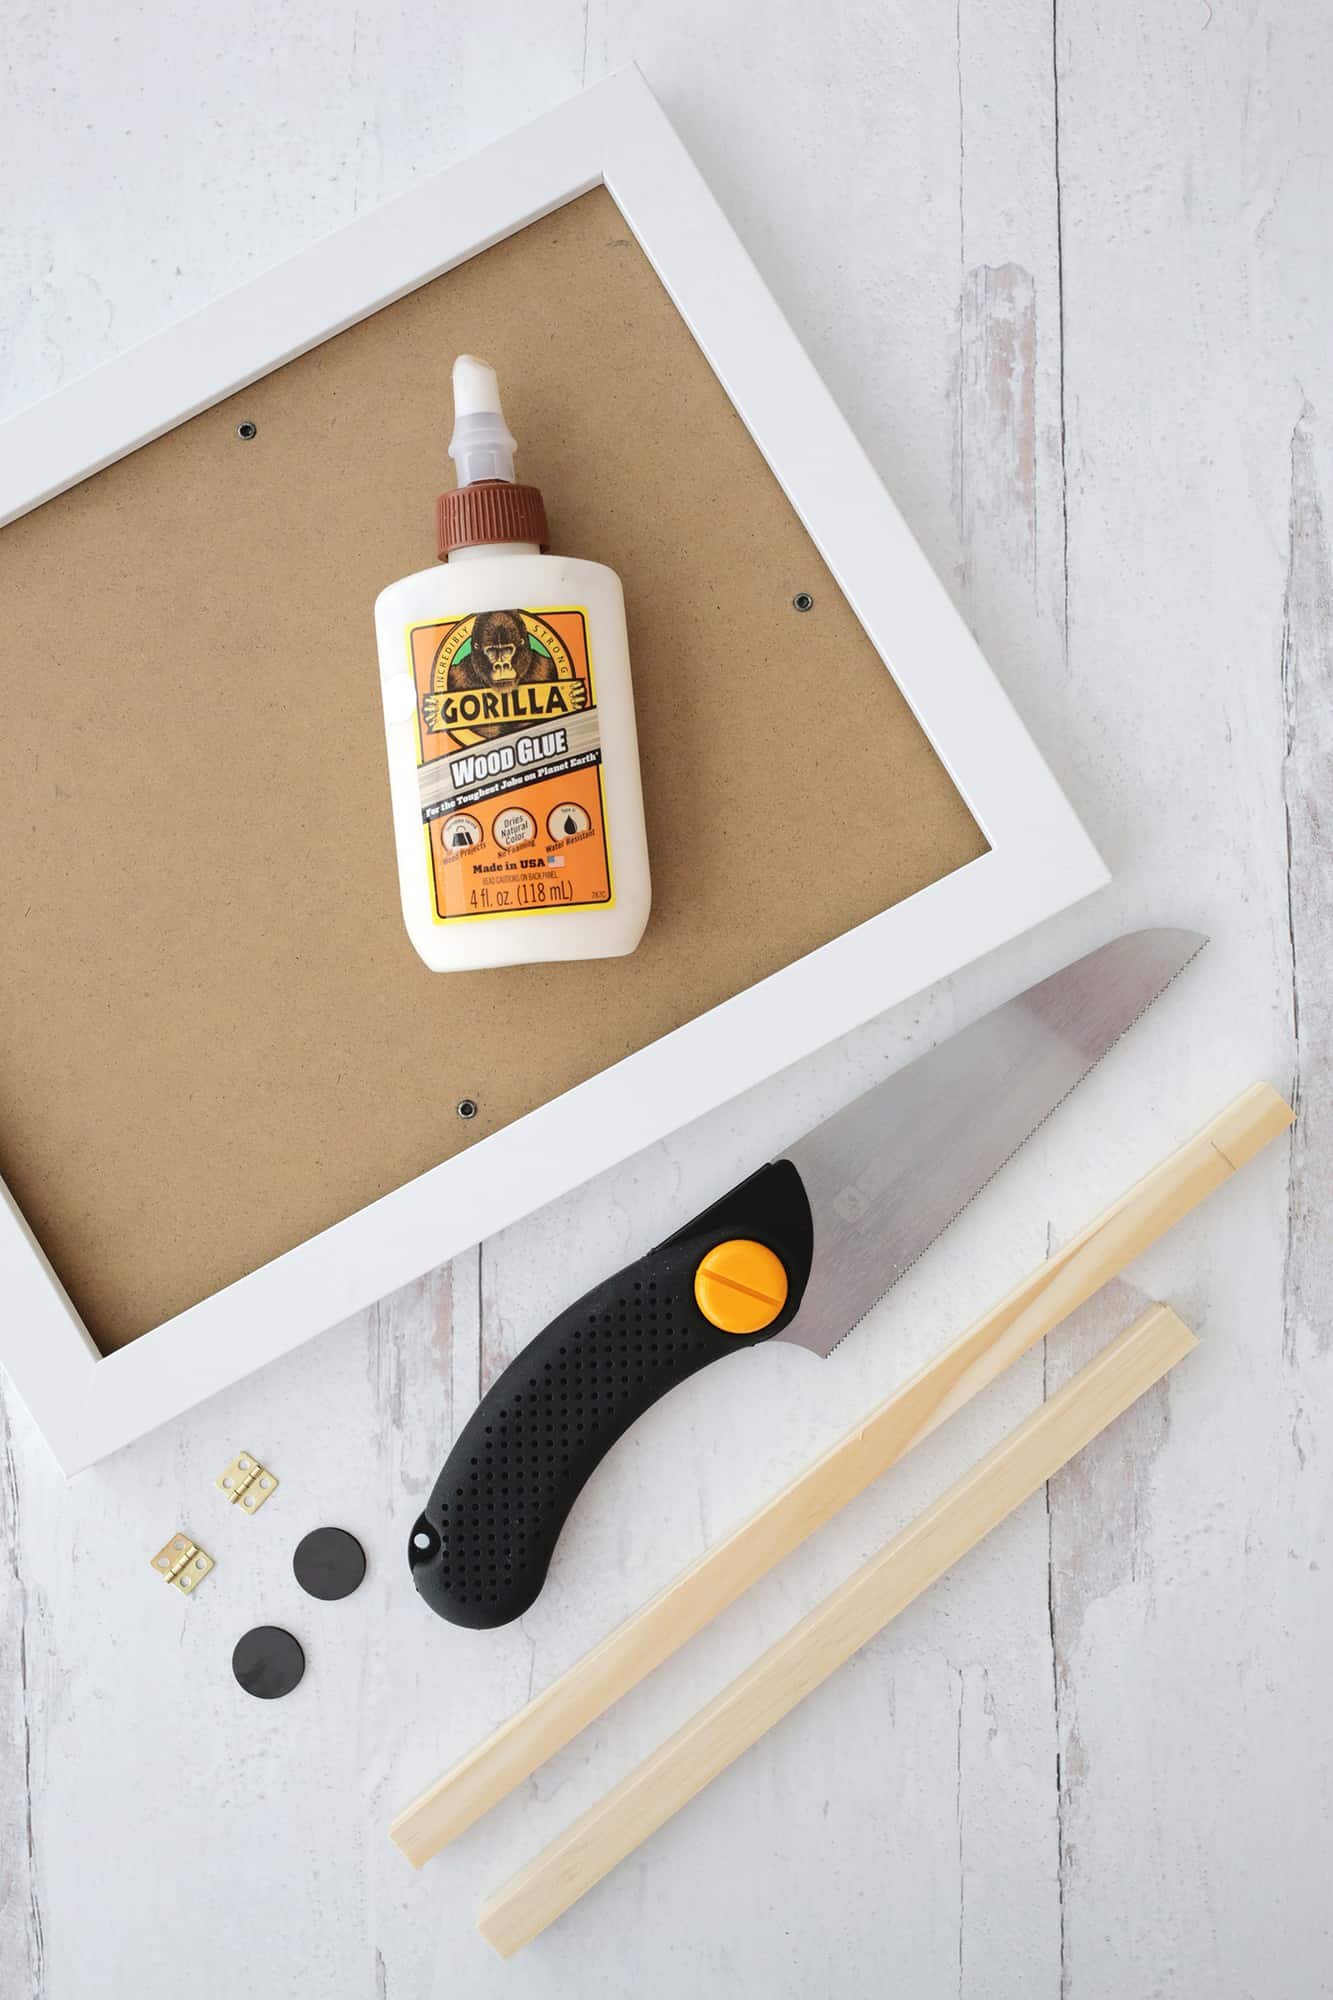
Supplies:
-small saw (this compact hand saw is great!)
–1/2″ square wooden dowels (x4)
–small metal hinges (x2)
–8 x 11.5″ picture frame
–superglue and woodglue
–foamcore board
–X-Acto knife, ruler, and cutting mat
-2 flushmount canvas hangers (these will sit flattest on the wall but these are a good second choice)
-2 magnets (I recommend these as they are stronger than the stick-on ones I tried first)
-wax paper
-hot glue gun
-paint the color of your frame (optional)
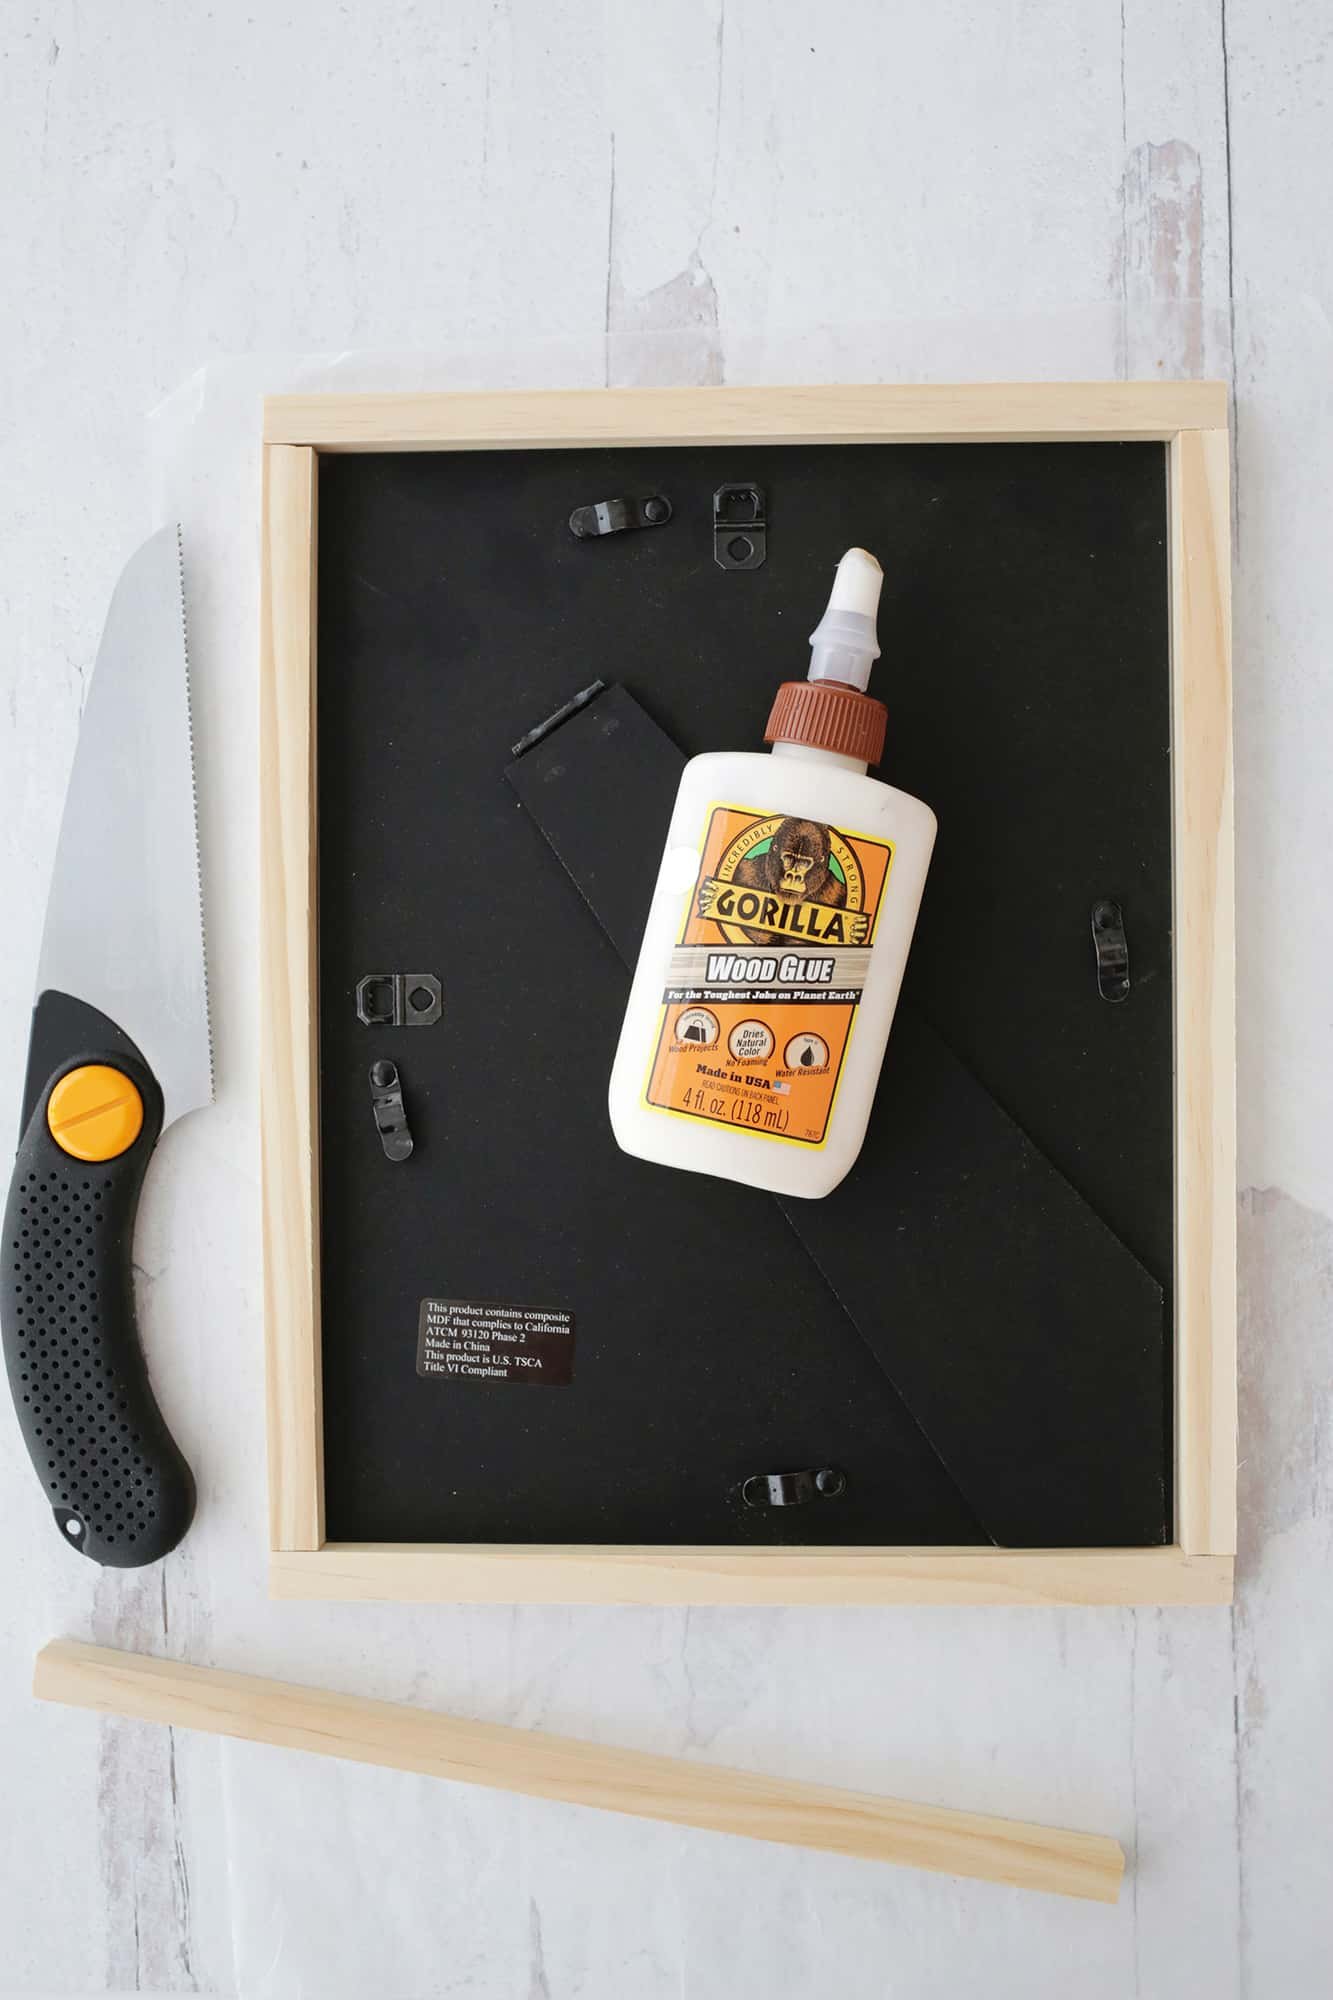
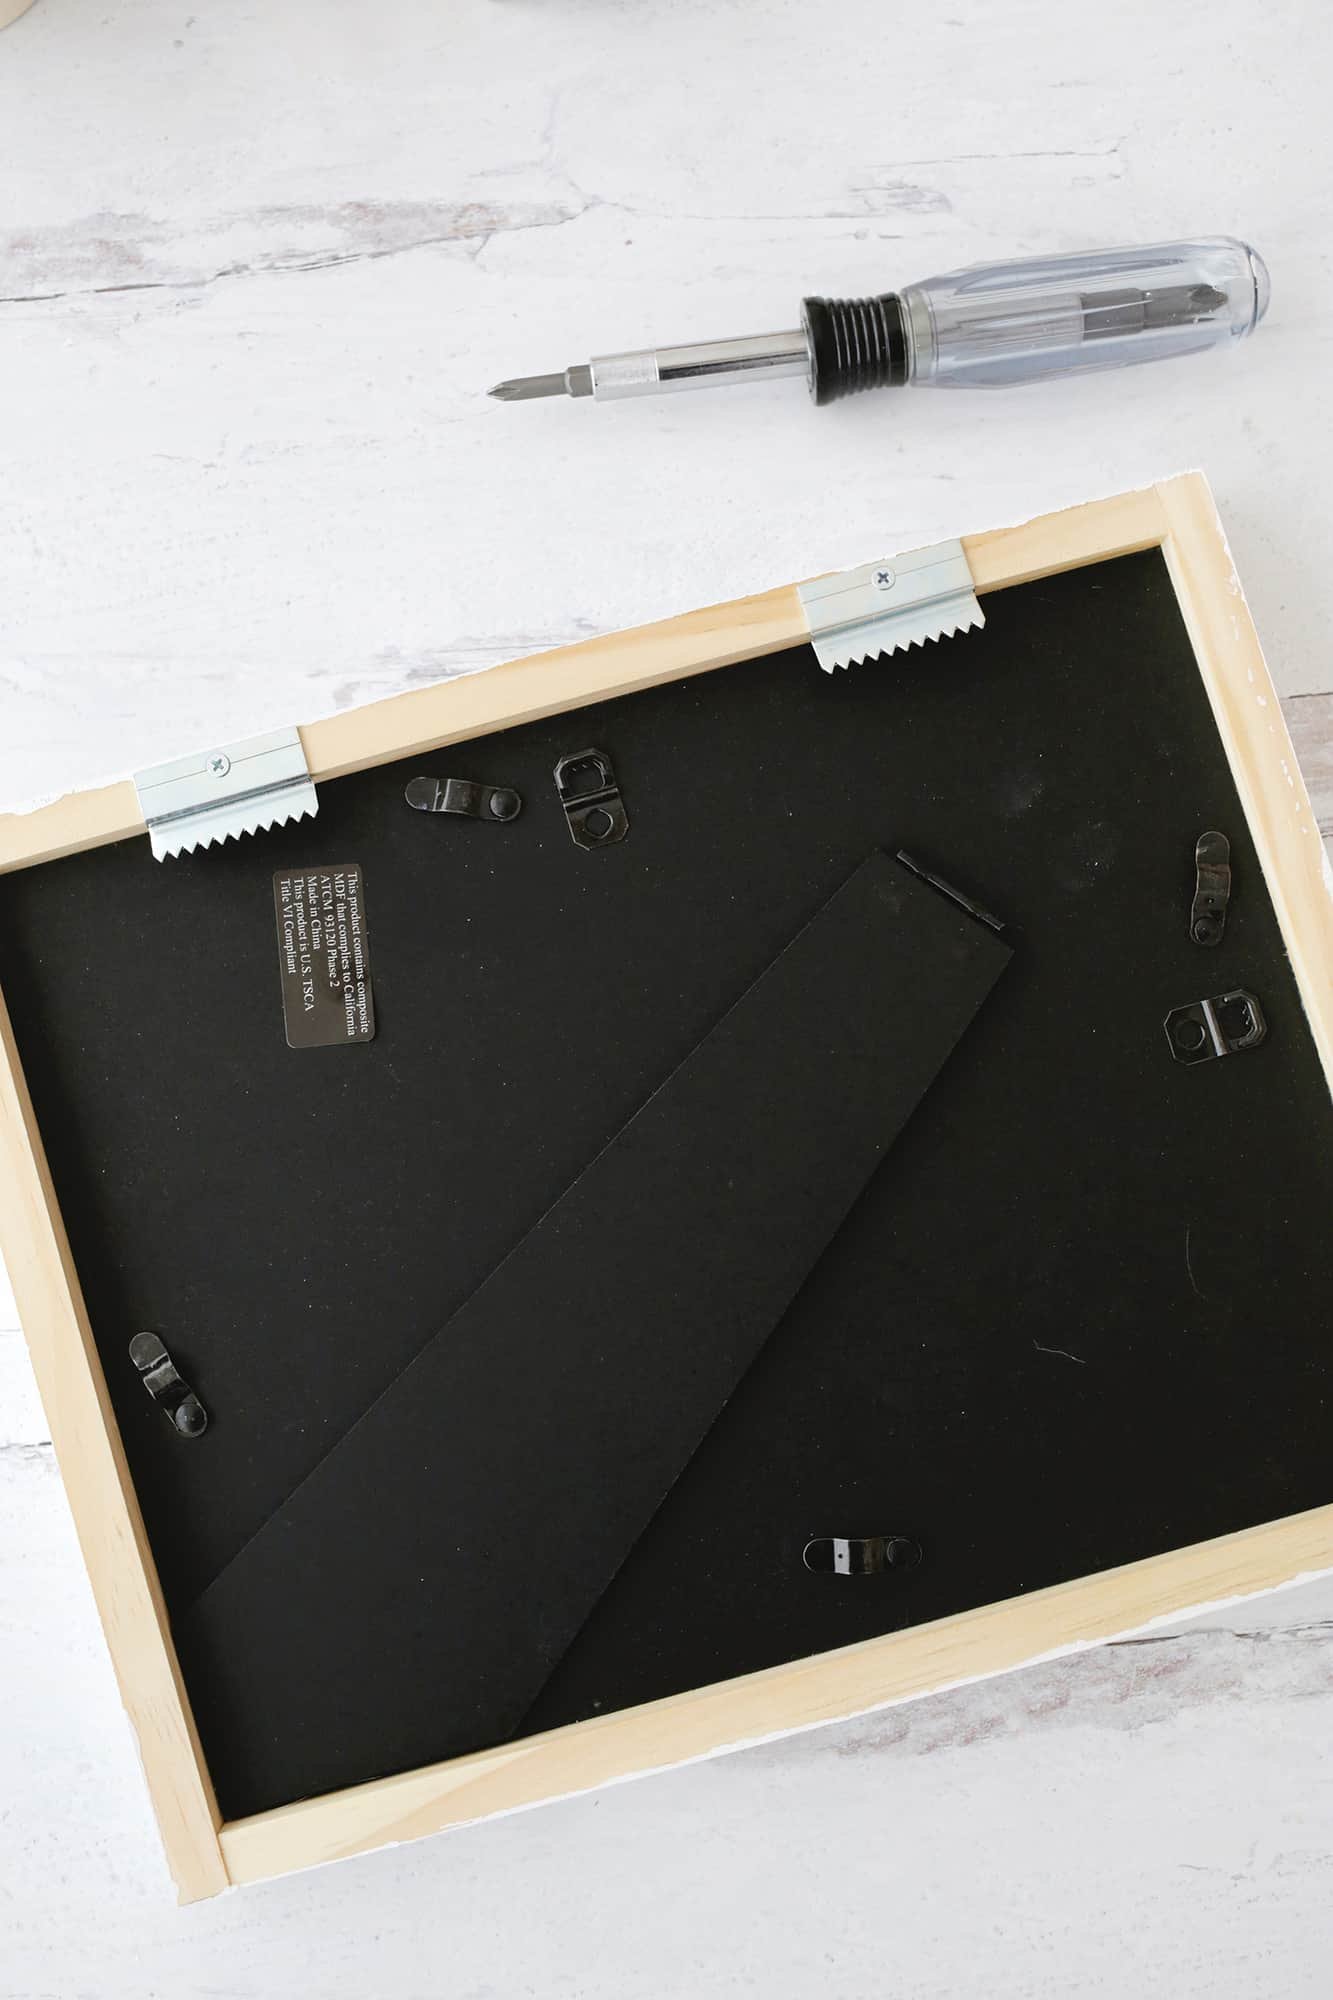
First, you’ll want to remove the back from your frame. Place it back-side-up on a piece of wax paper and cut your square dowels to fit to make a frame all the way around your backing (this small handsaw cut mine really easily and really quickly!).
Use some wood glue to attach the dowels to each other and line the inside edge of the dowel with glue where the frame backing will sit against it (so you are also glueing the backing to the inside of the frame at the same time.)
Having wax paper under it will protect your table from any wood glue seepage and the glue won’t stick to the wax paper when dry so you can peel it up easily.
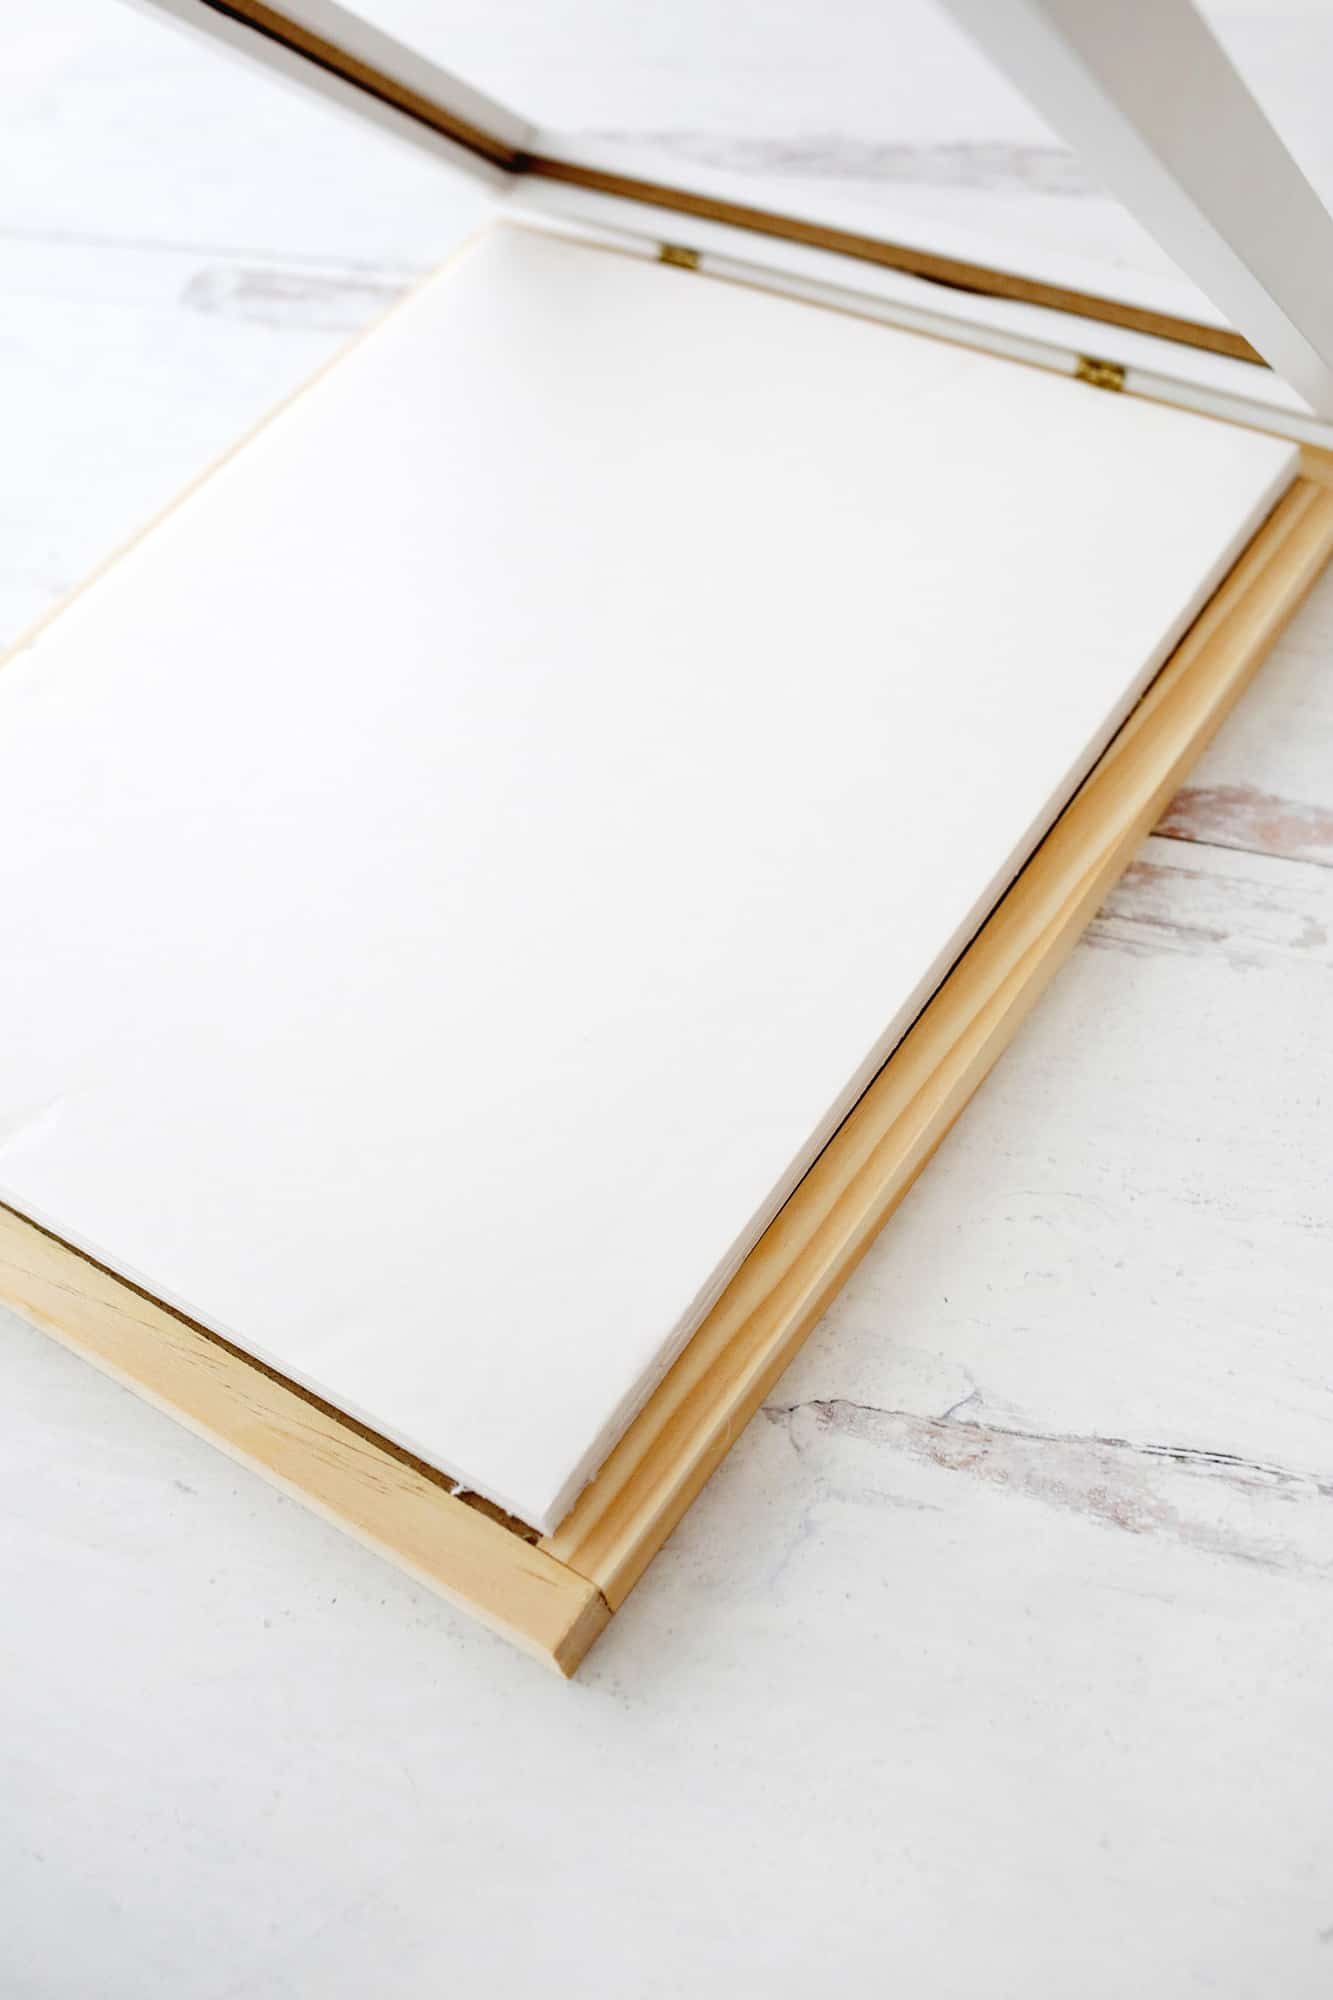
Once your glue has totally set, flip the frame over and use your small hinges to attach the framed backing to the front frame piece. You can screw the hinges in if you want, but the ones I bought didn’t have recessed holes for the screws.
The screwheads stuck out more than I would like and it wouldn’t close completely flat, but if you have hinges with recessed holes that won’t be an issue.
Hinges can be annoying to figure out exactly where they should go, so glueing them with super glue is actually a lot easier than screwing them in!
I just opened the hinge flat and glued two hinge plates at the edge of my backing frame (with the actual moving hinge part hanging over the edge) and then once that was dry enough, I folded the other side of the hinge down with a folded piece of wax paper in the middle to keep the hinge from being glued shut.
Then, I put some more super glue on top of the hinge plate and then centered and placed the top frame on top and allowed it to fully dry.
You really want to let the glue fully dry before trying to open it and take out the wax paper fold (give it a day) otherwise the hinges may pop off. Trust me!
Once the hinges are on, cut out two pieces of foam core slightly smaller than the size of art your frame holds and glue them onto the backing stacked on top of each other.
If you don’t have this foamcore backing, your art piece will kind of float around in the space but the backing helps to push it up to the front of the frame so it looks much better.
If you want your frame to look more like one unit, you can also paint the wooden dowels you added the color of your frame so the blend together more.
Glue your magnets to the frame and backing in the two corners opposite your hinges so that the frame will stay closed when hanging, and screw in your canvas hangers on the back with a screwdriver and your artwork display is ready to hang!
Don’t want to add holes to your wall and want to hang these in seconds? Use these instead of the hangers!
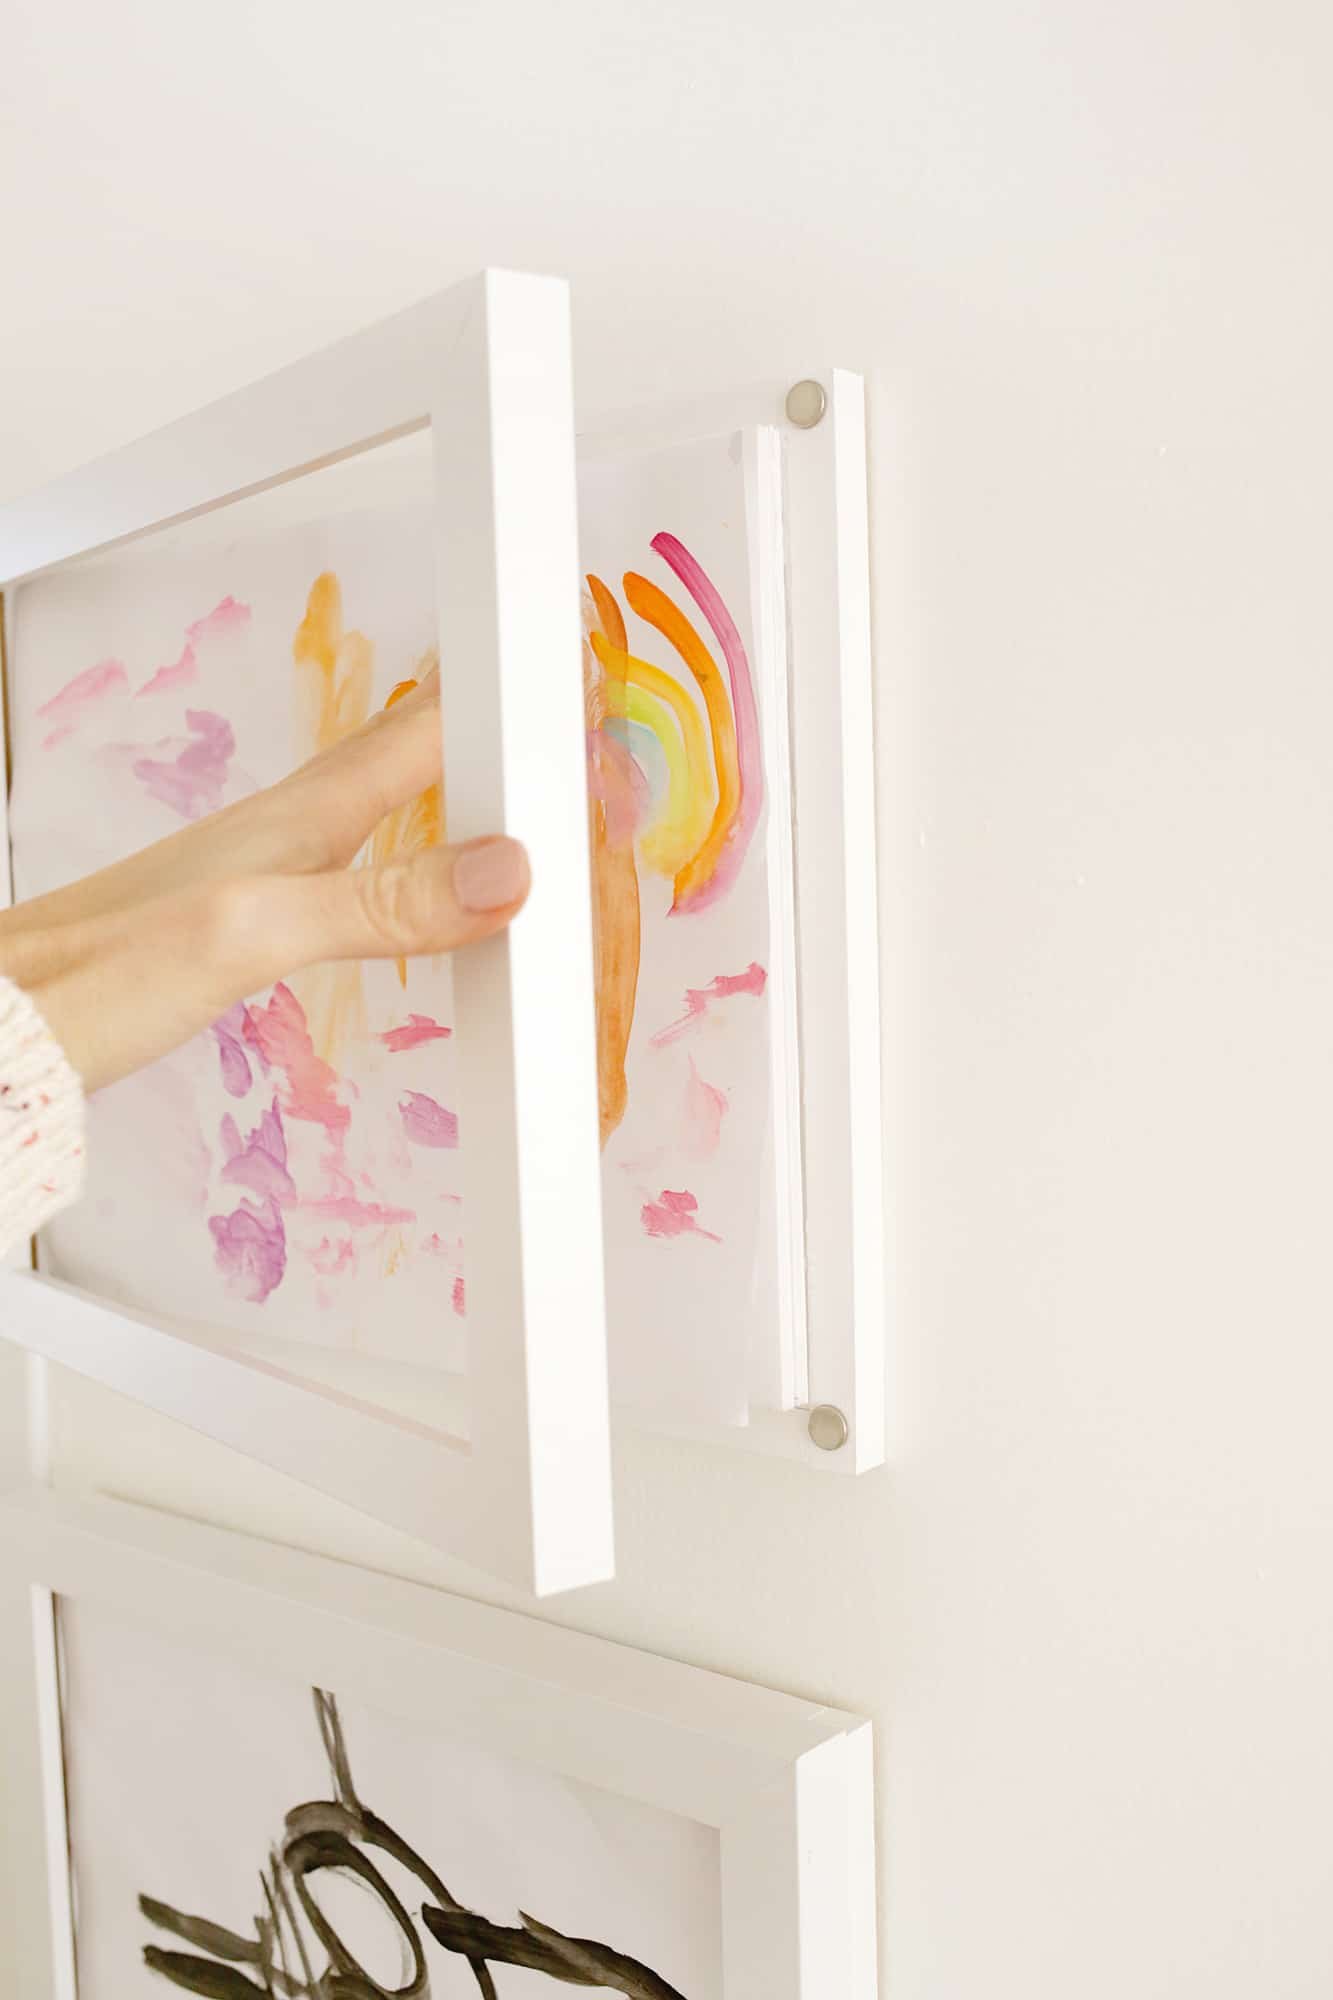
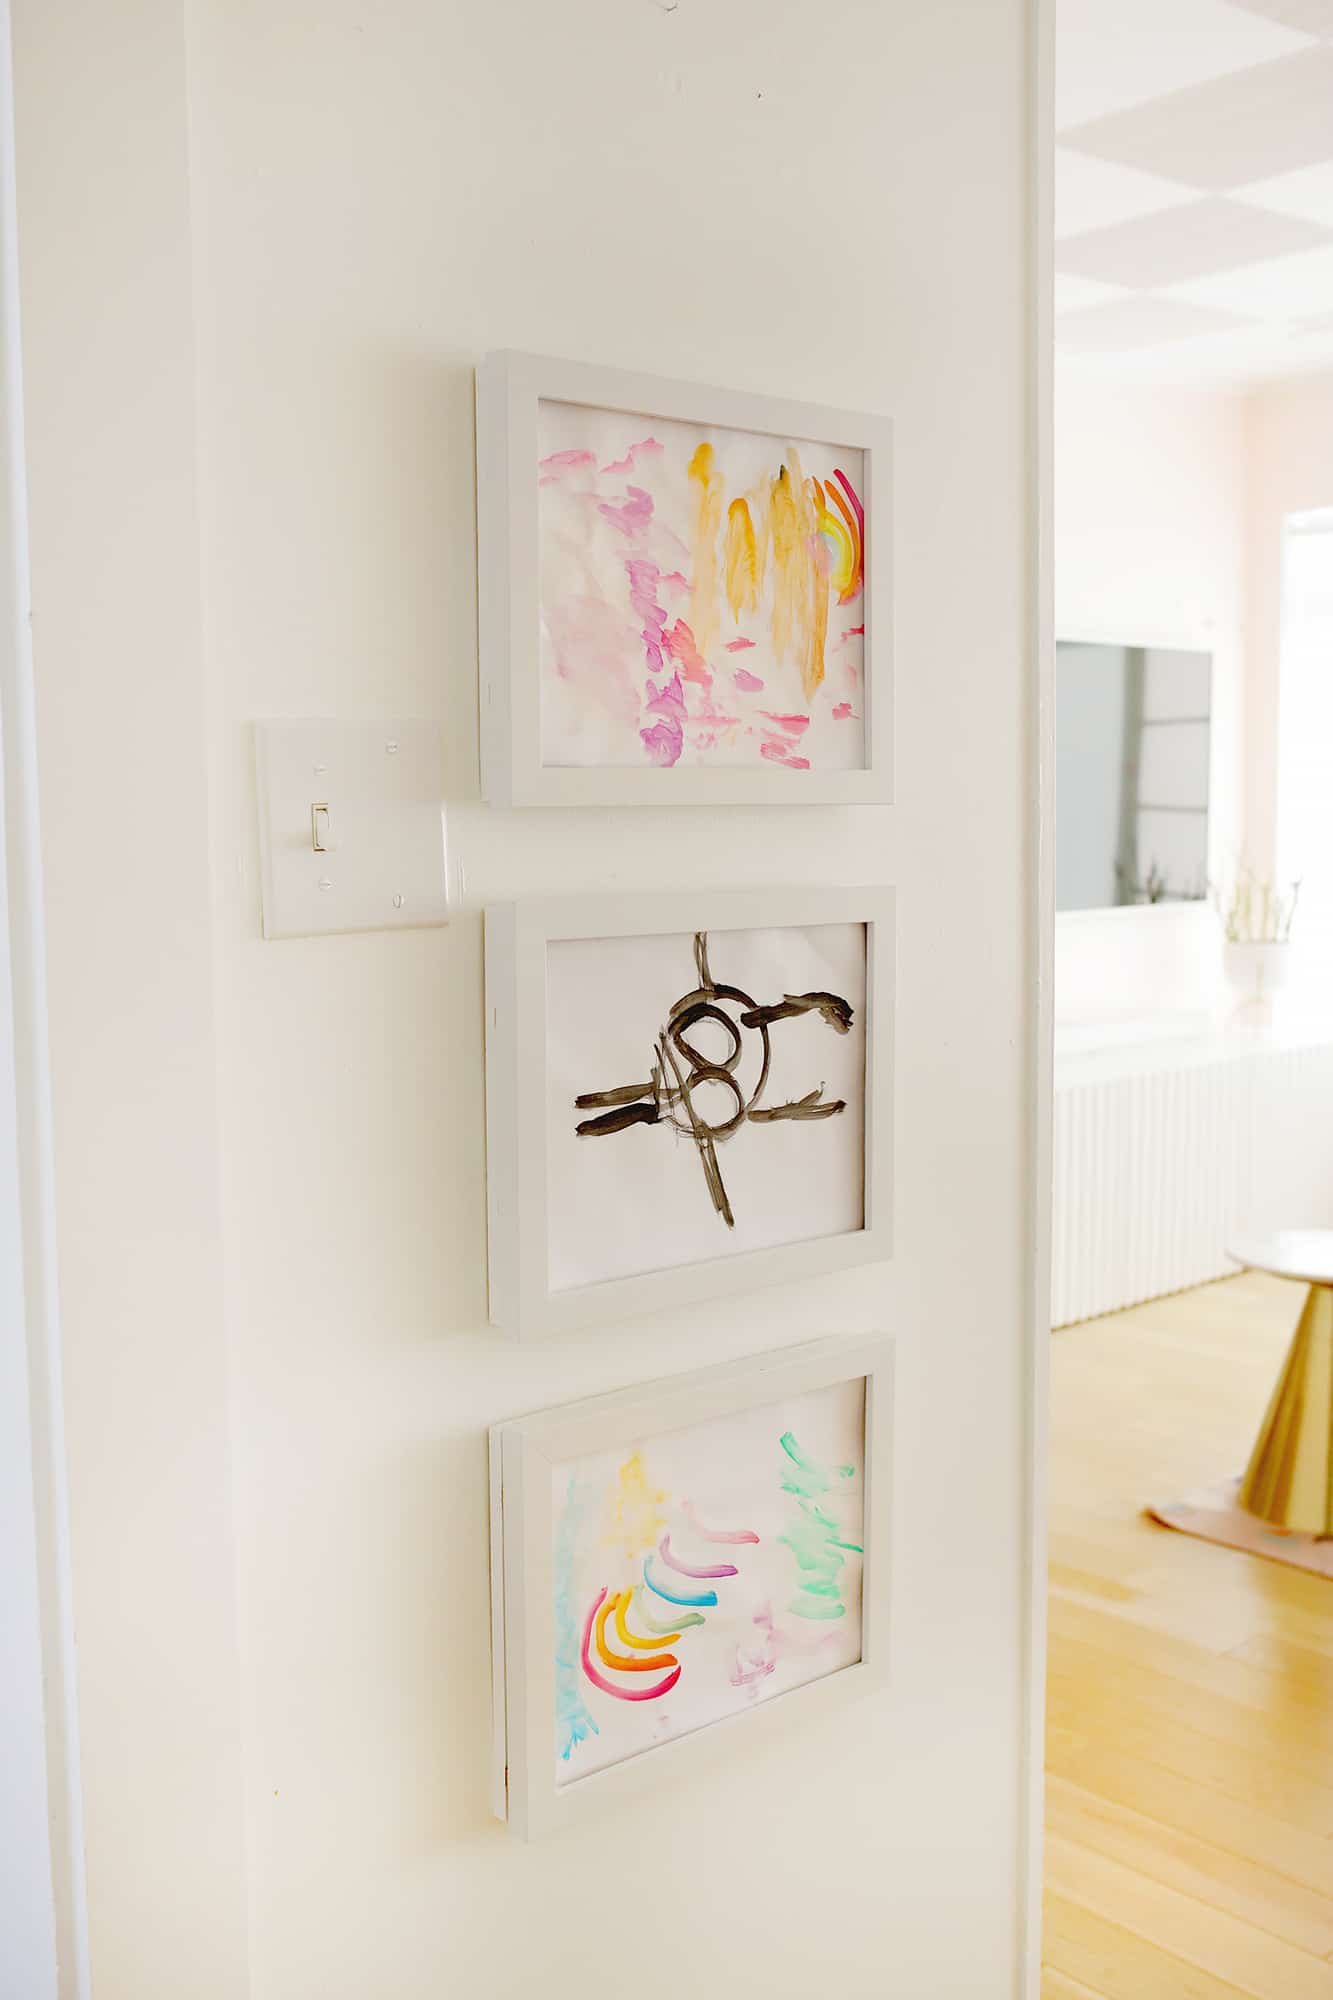
Lola was so excited to see this kid’s art frame, and when I showed her how it worked, she immediately gathered three of her favorite drawings she had done that week to switch them out.
I hung them at a height she can reach on her own (or on our little step stool we keep around for hand washing) so if you want your kiddos to be able to do it themselves, make sure you hang them where they are within reach for them!
Q: Can you hang these vertically and horizontally?
A: Yes! I hung them all horizontally, but to make a vertical one, just add the hinges to the longer side instead of the shorter side and move the canvas hangers from the long side to the short side. Easy!
Q: Can I make these in another size?
A: Yes! You can choose whatever size frame you want (9″ x 12″ is another popular paper size so this frame would be good for that).
We do a lot of coloring on copy paper since I print out free coloring pages online or the backs of old printed documents, so 8.5″ x 11″ seemed like a good size for us.
Lots of kids art paper comes in a size similar to that, so I figured I could trim those down to fit easily with scissors.
Hope this is a fun way to get those precious pieces of art up on your wall for all to see! This is also a great option if you don’t want to make your own and want one ready made.
Check out all our other Kiddo DIYs in our archives for more fun ideas! xo. Laura
Love making art with the kids in your life? Check out…

KID’S ART FRAME DIY
Art frame to easily display and switch out kids art
Prep Time 1 hour 30 minutes
Total Time 1 day 1 hour 30 minutes
First you’ll want to remove the back from your frame. Place it back-side-up on a piece of wax paper and cut your square dowels to fit to make a frame all the way around your backing (this small handsaw cut mine really easily and really quickly!).
Use some wood glue to attach the dowels to each other and line the inside edge of the dowel with glue where the frame backing will sit against it so you are also glueing the backing to the inside of the frame at the same time. Having wax paper under it will protect your table from any wood glue seepage and the glue won’t stick to the wax paper when dry so you can peel it up easily.
Once your glue has totally set, flip the frame over and use your small hinges to attach the framed backing to the front frame piece. You can screw the hinges in if you want, but the ones I bought didn’t have recessed holes for the screws so the screwheads stuck out more than I would like and it wouldn’t close completely flat, but if you have hinges with recessed holes that won’t be an issue.
Hinges can be annoying to figure out exactly where they should go, so glueing them with super glue is actually a lot easier than screwing them in! I just opened the hinge flat and glued two hinge plates at the edge of my backing frame (with the actual moving hinge part hanging over the edge) and then once that was dry enough, I folded the other side of the hinge down with a folded piece of wax paper in the middle to keep the hinge from being glued shut, put some more super glue on top of the hinge plate and then centered and placed the top frame on top and allowed it to fully dry.
You really want to let the glue fully dry before trying to open it and take out the wax paper fold (give it a day) otherwise the hinges may pop off. Trust me!
Once the hinges are on, cut out two pieces of foam core slightly smaller than the size of art your frame holds and glue them onto the backing stacked on top of each other. If you don’t have this foamcore backing, your art piece will kind of float around in the space but the backing helps to push it up to the front of the frame so it looks much better.
If you want your frame to look more like one unit, you can also paint the wooden dowels you added the color of your frame so the blend together more.
Glue your magnets to the frame and backing in the two corners opposite your hinges so that the frame will stay closed when hanging, and screw in your canvas hangers on the back with a screwdriver and your artwork display is ready to hang!