

There are so many “firsts” in a kid’s life, that sometimes it’s hard to keep track of them. But when I was flossing my 4-year-old daughter’s teeth last week, my eyes just about popped out of my head when I saw her first adult tooth had popped through behind her bottom front tooth, and the baby tooth in front of it was starting to wiggle.
When I told her what I saw we both started screaming with excitement and we ran to a low mirror so she could see and she just stood there in awe, whispering “wow!” as she wiggled it in the mirror.
She’s picked up from books and shows what the Tooth Fairy’s job is, so she immediately said she wanted “a gold coin” from the Tooth Fairy once it comes out, so I knew I needed to start planning my end of that soon.
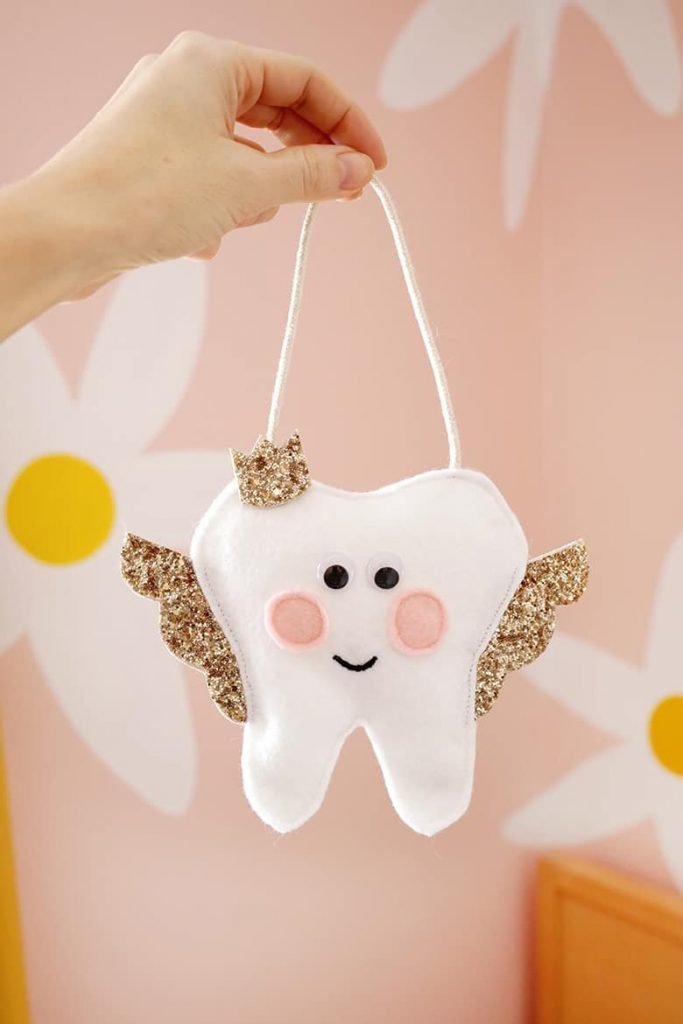
I made this little Tooth Fairy pillow DIY in just one afternoon, and while I did sew some elements of it, you can easily make a no-sew option as well.

Q: What is a Tooth Fairy pillow?
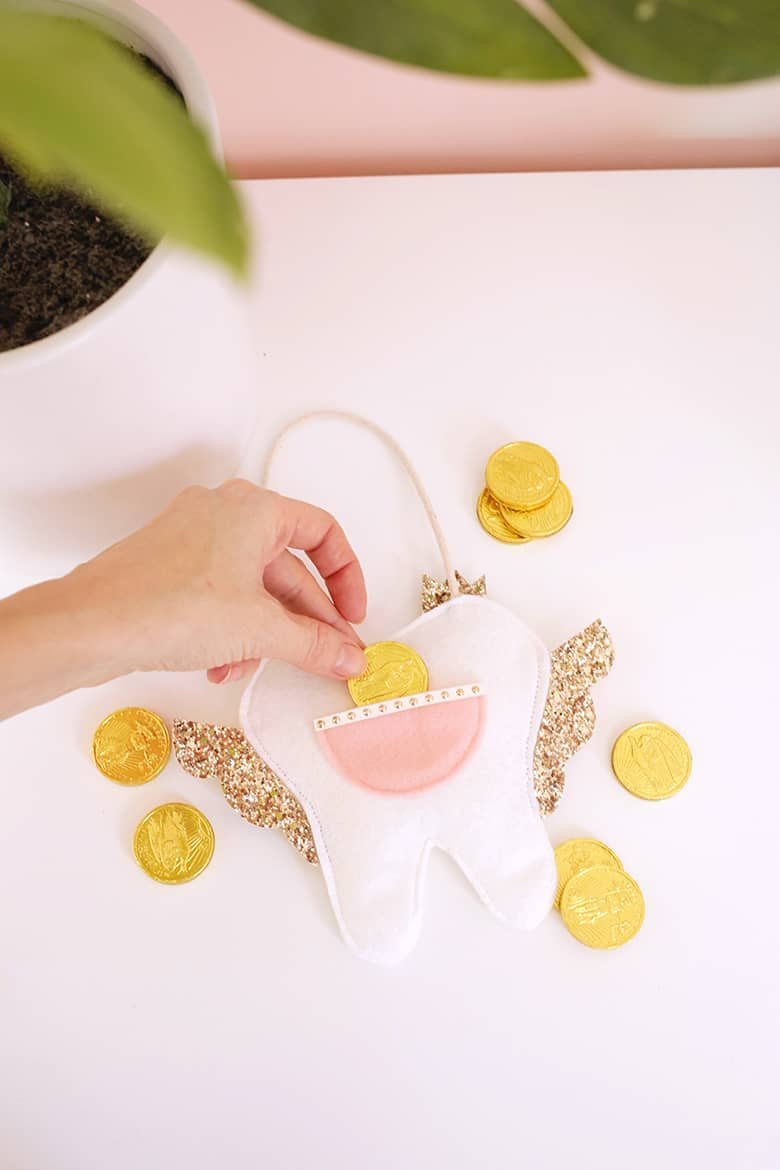
A: A Tooth Fairy pillow is a small pillow or plush doll-type tooth that has a pocket for you to put your little one’s tiny tooth in so it doesn’t get lost under their pillow while they sleep (their teeth are so tiny!). You can replace the tooth with a gift from the Tooth Fairy!
Q: Do I have to put the Tooth Fairy pillow under my kid’s pillow?
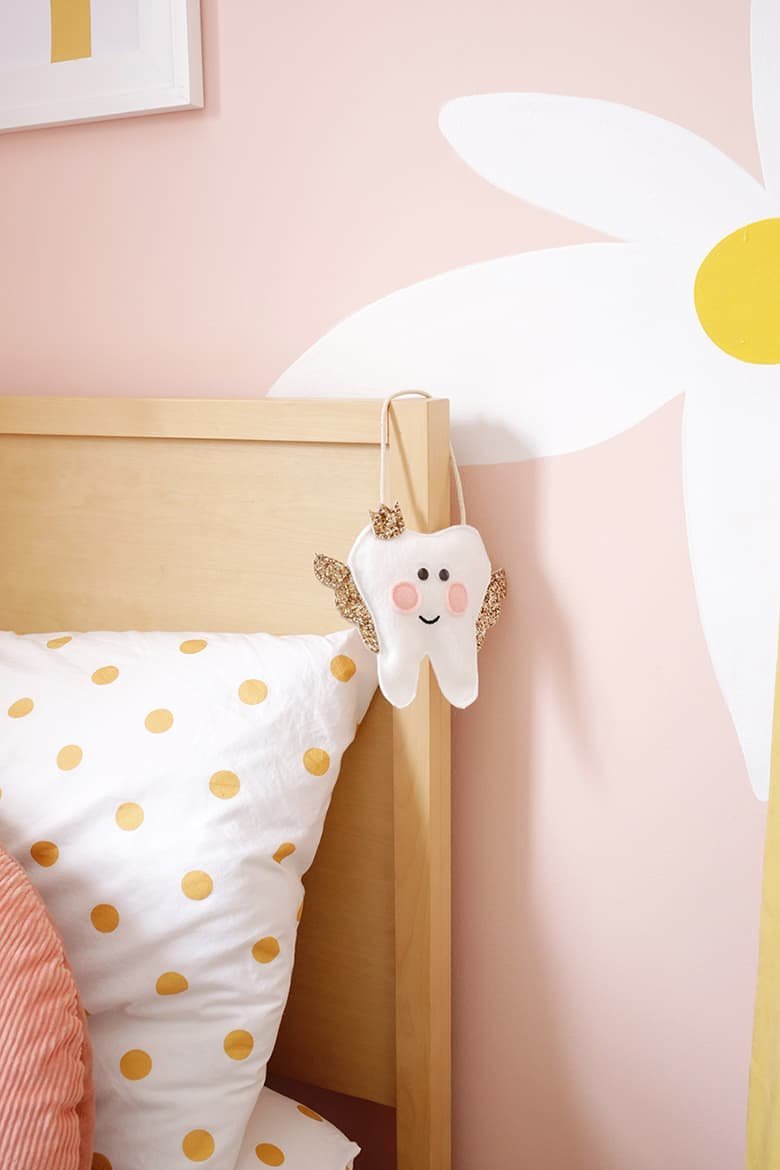
A: No! You can add a small rope or ribbon and hang them on a door or bedpost so you don’t risk waking your kiddo up as you go to make the switch (which is what I plan to do), or you can make it without a hanger and put it under the pillow old school-style if your kiddo is a heavy sleeper.
Q: What types of items does the Tooth Fairy bring?
A: We always got quarters or dollars growing up, but you can either put some money in the pocket or another type of small prize like stickers, temporary tattoos, or chocolate coins, which fit perfectly in the pocket as well! Although maybe skip the chocolate if you are putting it under the pillow in a hot room where they might melt.
Q: Does the Tooth Fairy come for every tooth?
A: This is totally up to you, but usually the Tooth Fairy shows up for every baby tooth, so keep that in mind when budgeting how much the tooth fairy is going to give for each one if you’re doing money. That can add up quickly!
Supplies:
–felt (white felt for tooth and pink for cheeks)
–free Tooth Fairy pattern download
–fabric glue
–straight pins
–fabric scissors
–black embroidery thread for mouth (or paint pen for no-sew option)
–small rope or ribbon for hanger
–batting or pillow stuffing
–google eyes
–glitter fabric
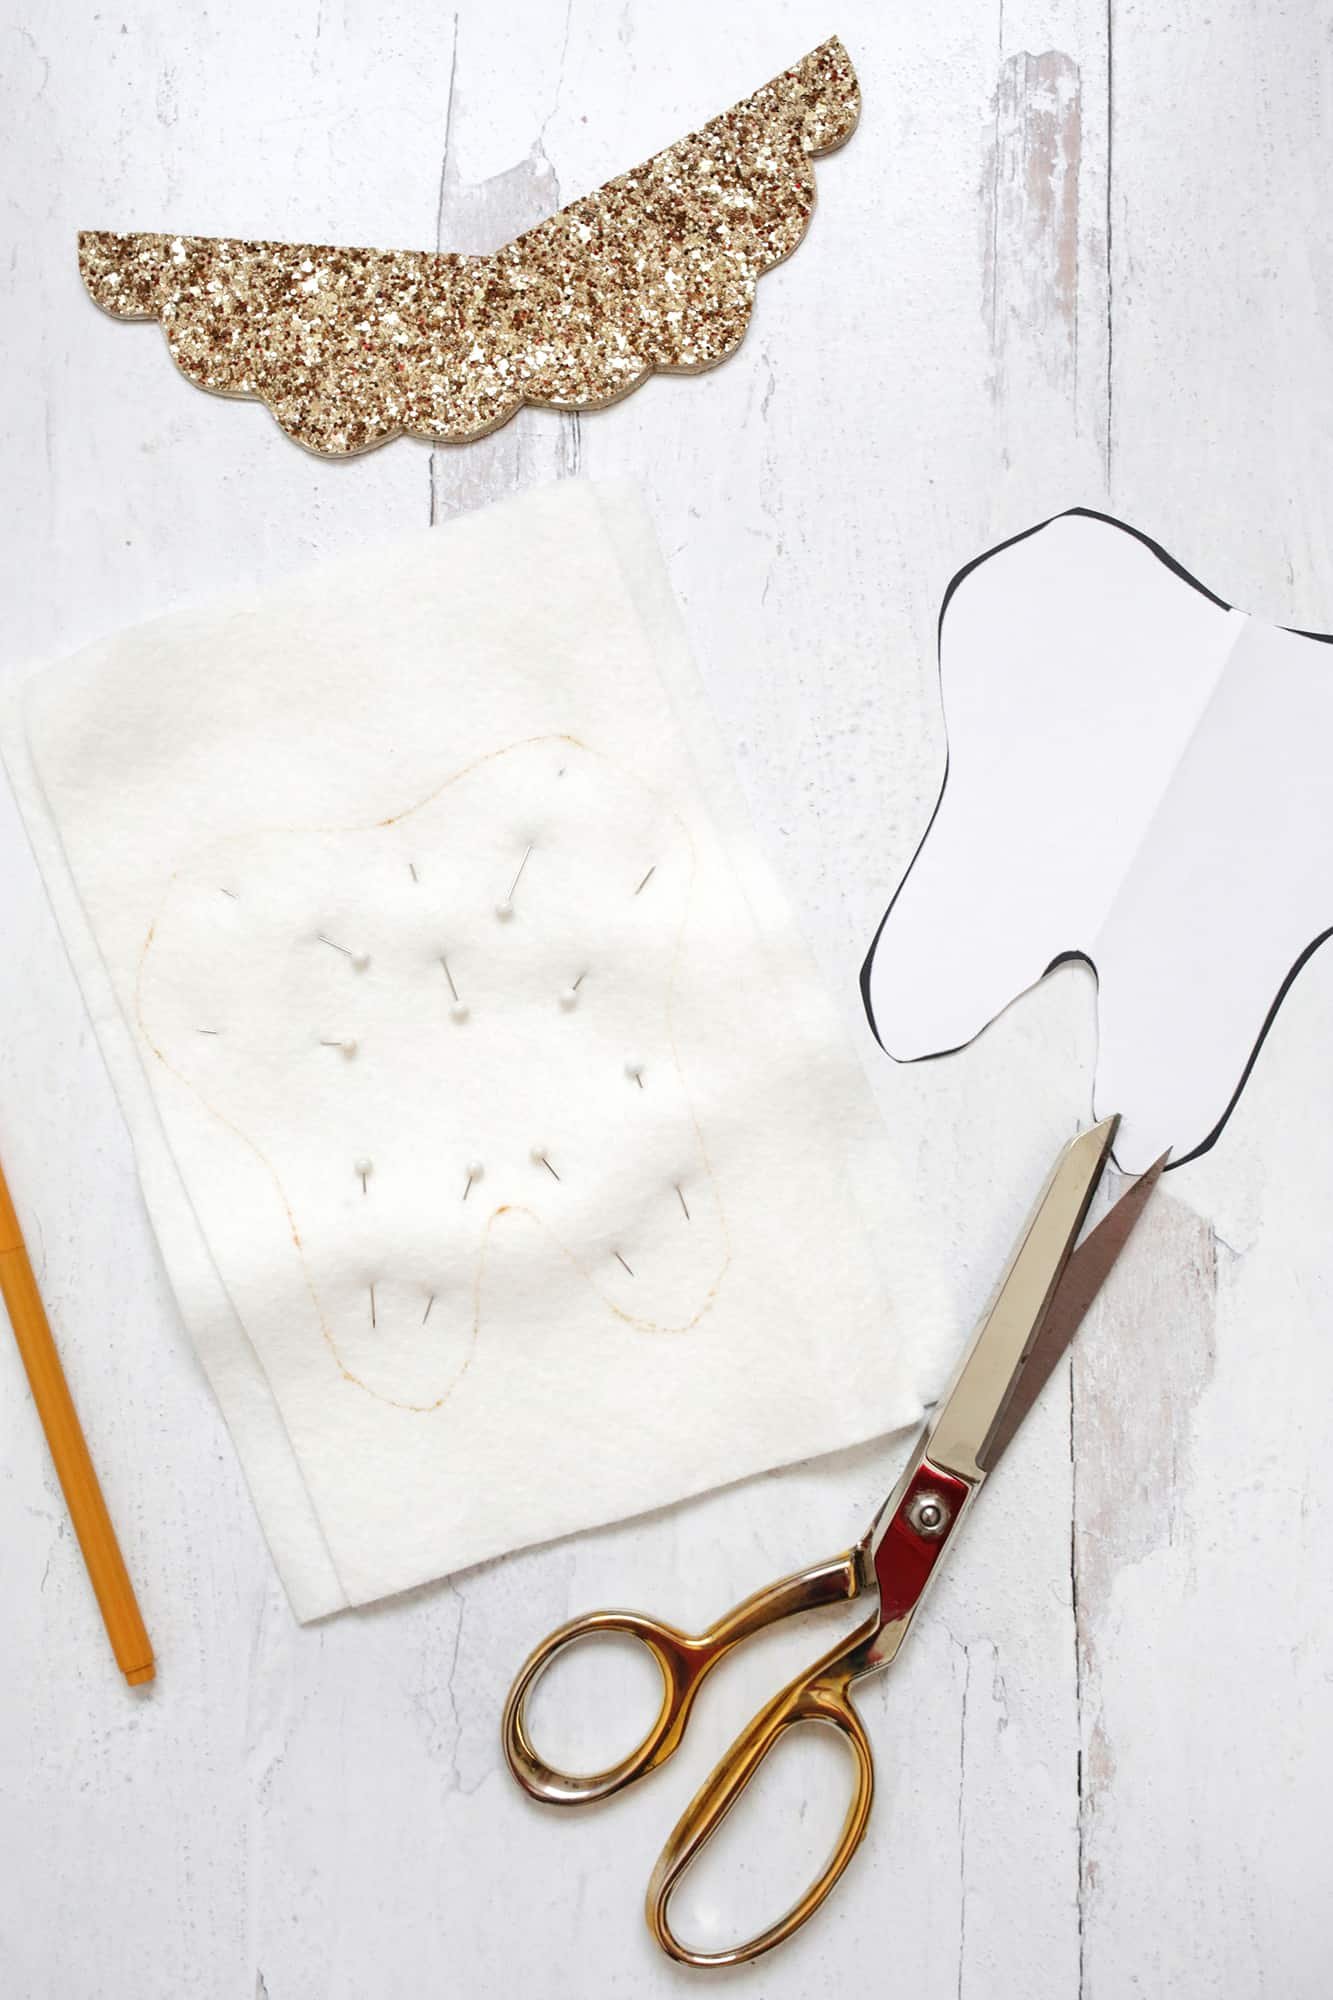
Print your pattern download and cut out two teeth shapes from your white felt, and two round circles and your pocket piece from your pink felt.
Cut out your wing and crown pieces from your glitter fabric as well.
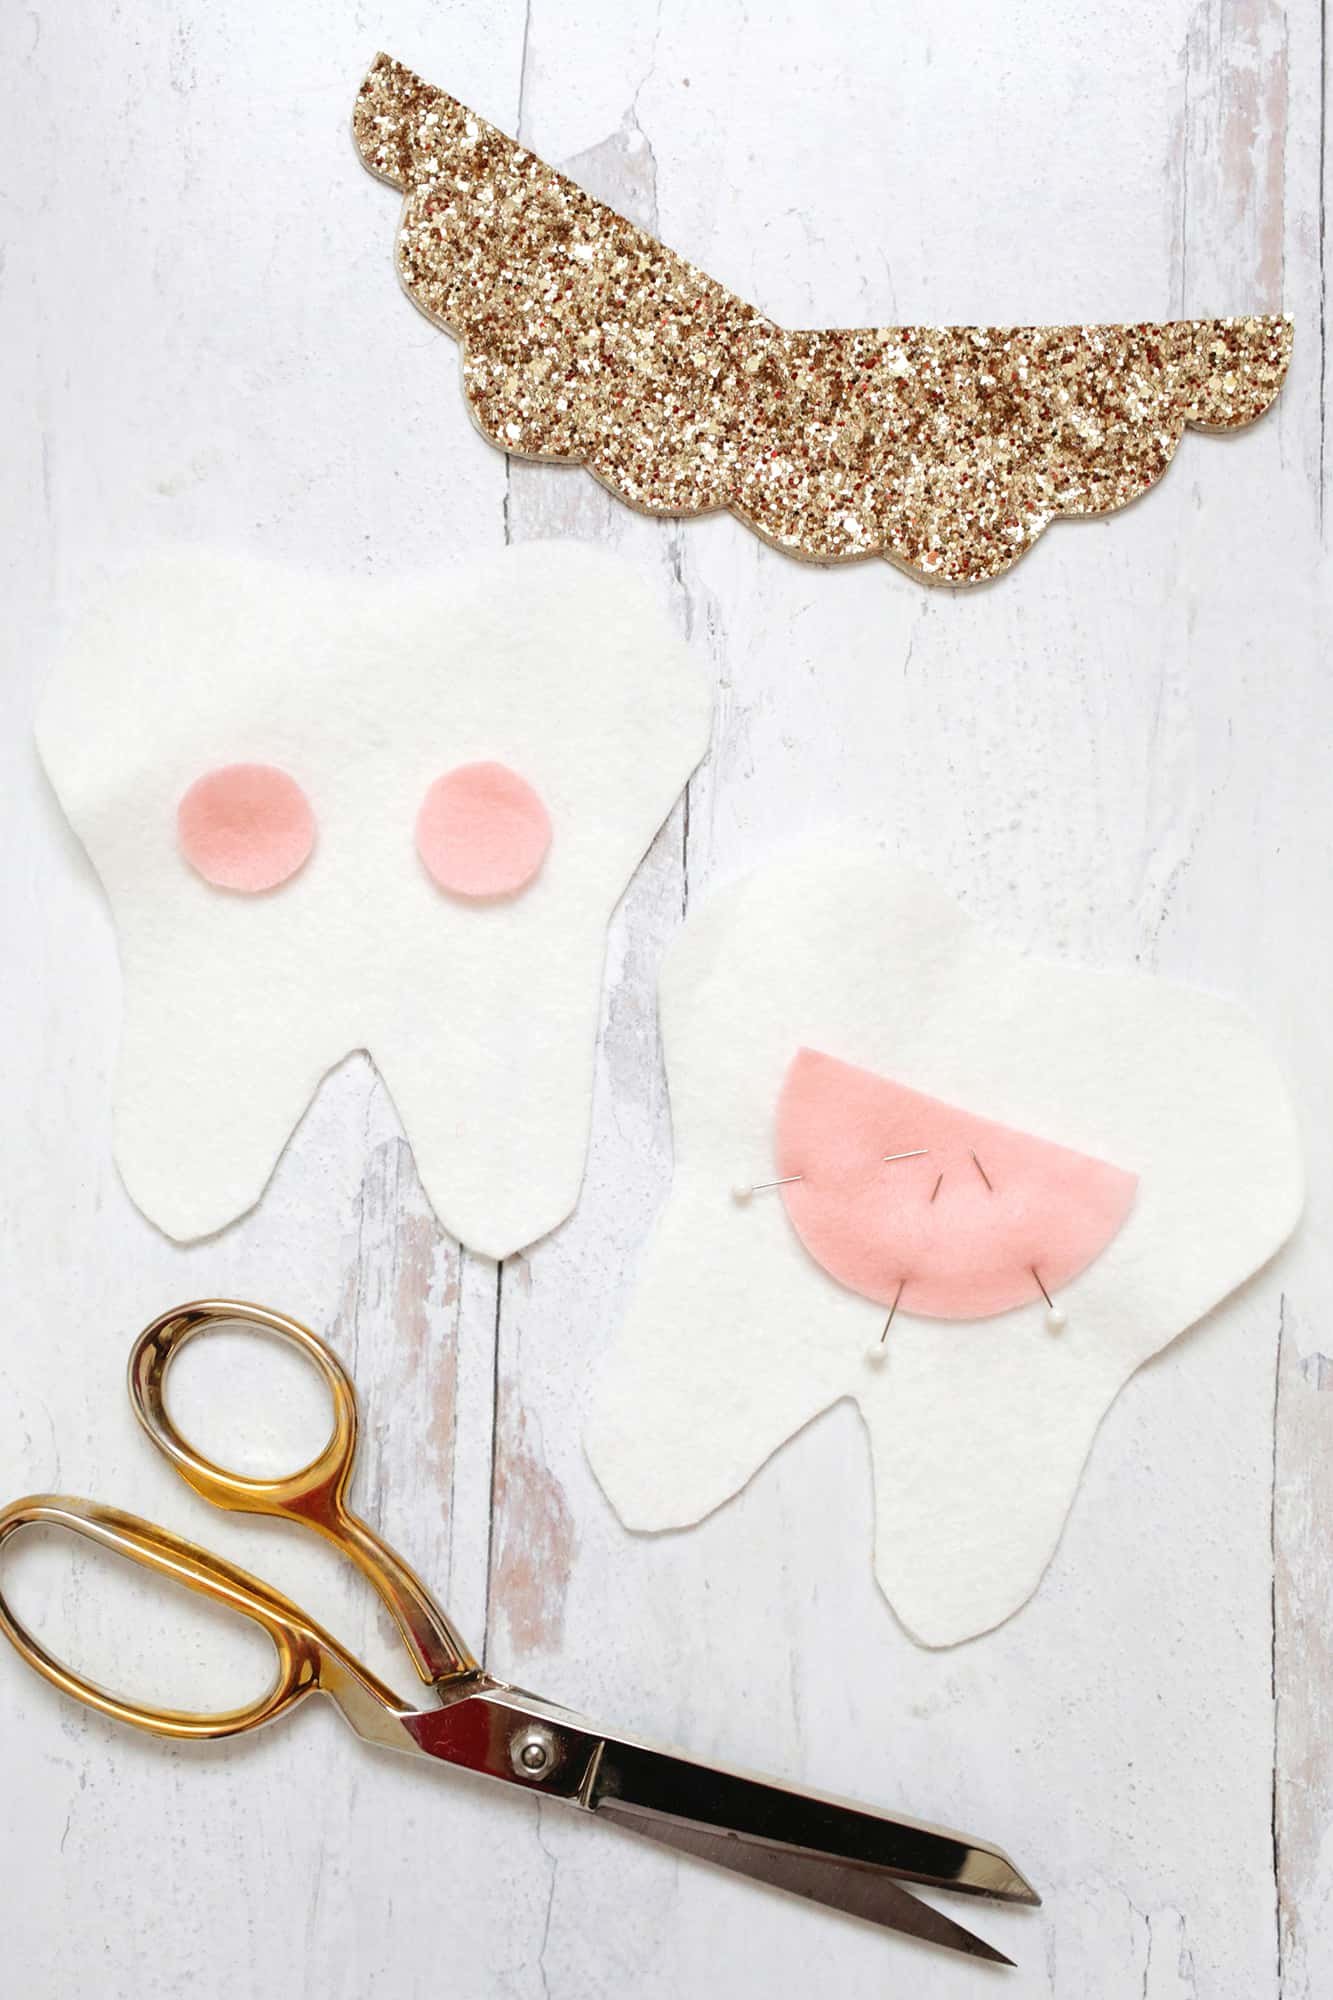
Either sew with pink thread (or glue for no-sew) your pink round cheeks onto the face of your Tooth Fairy. To sew your mouth, use a thin marker to draw a smile and then embroider the line either by sewing little vertical lines all next to each other (along the pen mark) to make a smile, or by using a method like this one.
For no-sew, use a black paint pen to draw it on and allow the paint to dry!

I decided to crop the wings a little smaller than I first made them to save on material, so I only had to sew through one layer instead of two.
Make sure when you cut your wings to trace them facing one direction and then flip the template horizontally to trace it again the opposite way (so the glitter is facing the right direction when you go to attach them together).
Set your wings aside for a moment.
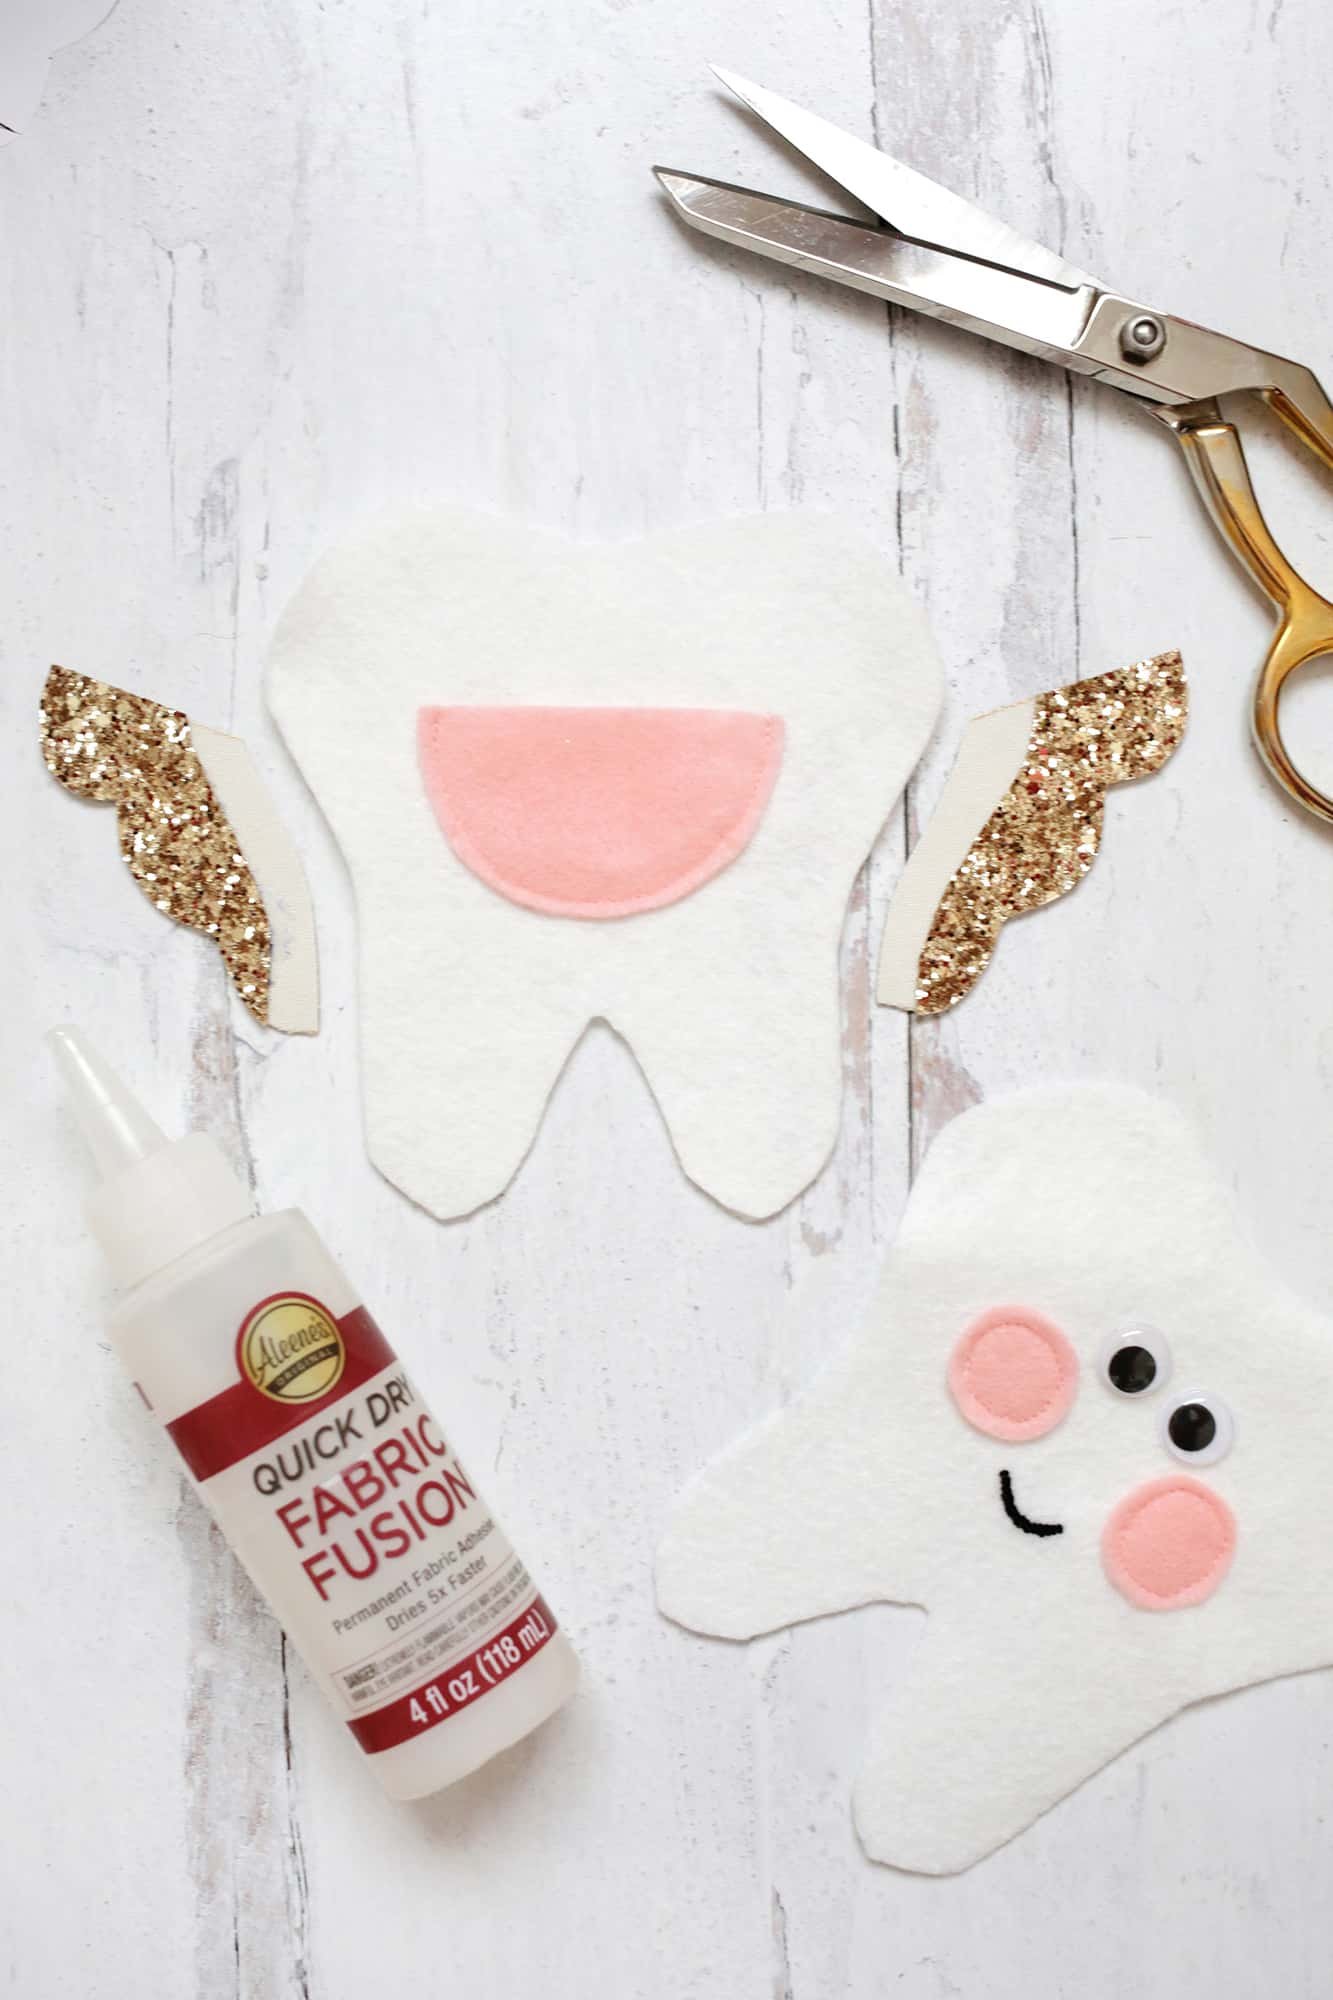
Glue on your google eyes, or you can embroider a different style of eye that you like or even use buttons for the eyes!
For the back of the pillow, center your pocket on the back and either sew along the half circle line, leaving the top open to be your pocket, or glue along that line leaving the top open for no-sew.
You can also add a ribbon or trim detail across the top like I did.
For the wings, take your two sets of wings, and line up the outer edges of each pair with the glitter sides facing out, gluing them together with fabric glue.
You’ll notice that the front piece of your wings is a little wider on the inner edge, so you have a strip of fabric that will get sandwiched between your front and back pieces and keep the wings in place.

If you are using a hanger, cut a piece of ribbon or thin rope about 10″ long.
Now it’s time to assemble! Place your wings so that you see the exposed inner strip facing up and add fabric glue to those exposed strips. Place your back Tooth Fairy pillow piece on top of the glued strips to connect the wings to that back piece. Allow the glue to dry.
Flip the back and wings over so it’s facing down and add some batting or a small amount of pillow fill to the middle of your pillow (I found it easiest to cut a few layers of batting about an 1″ smaller than my tooth shape to be the filling).
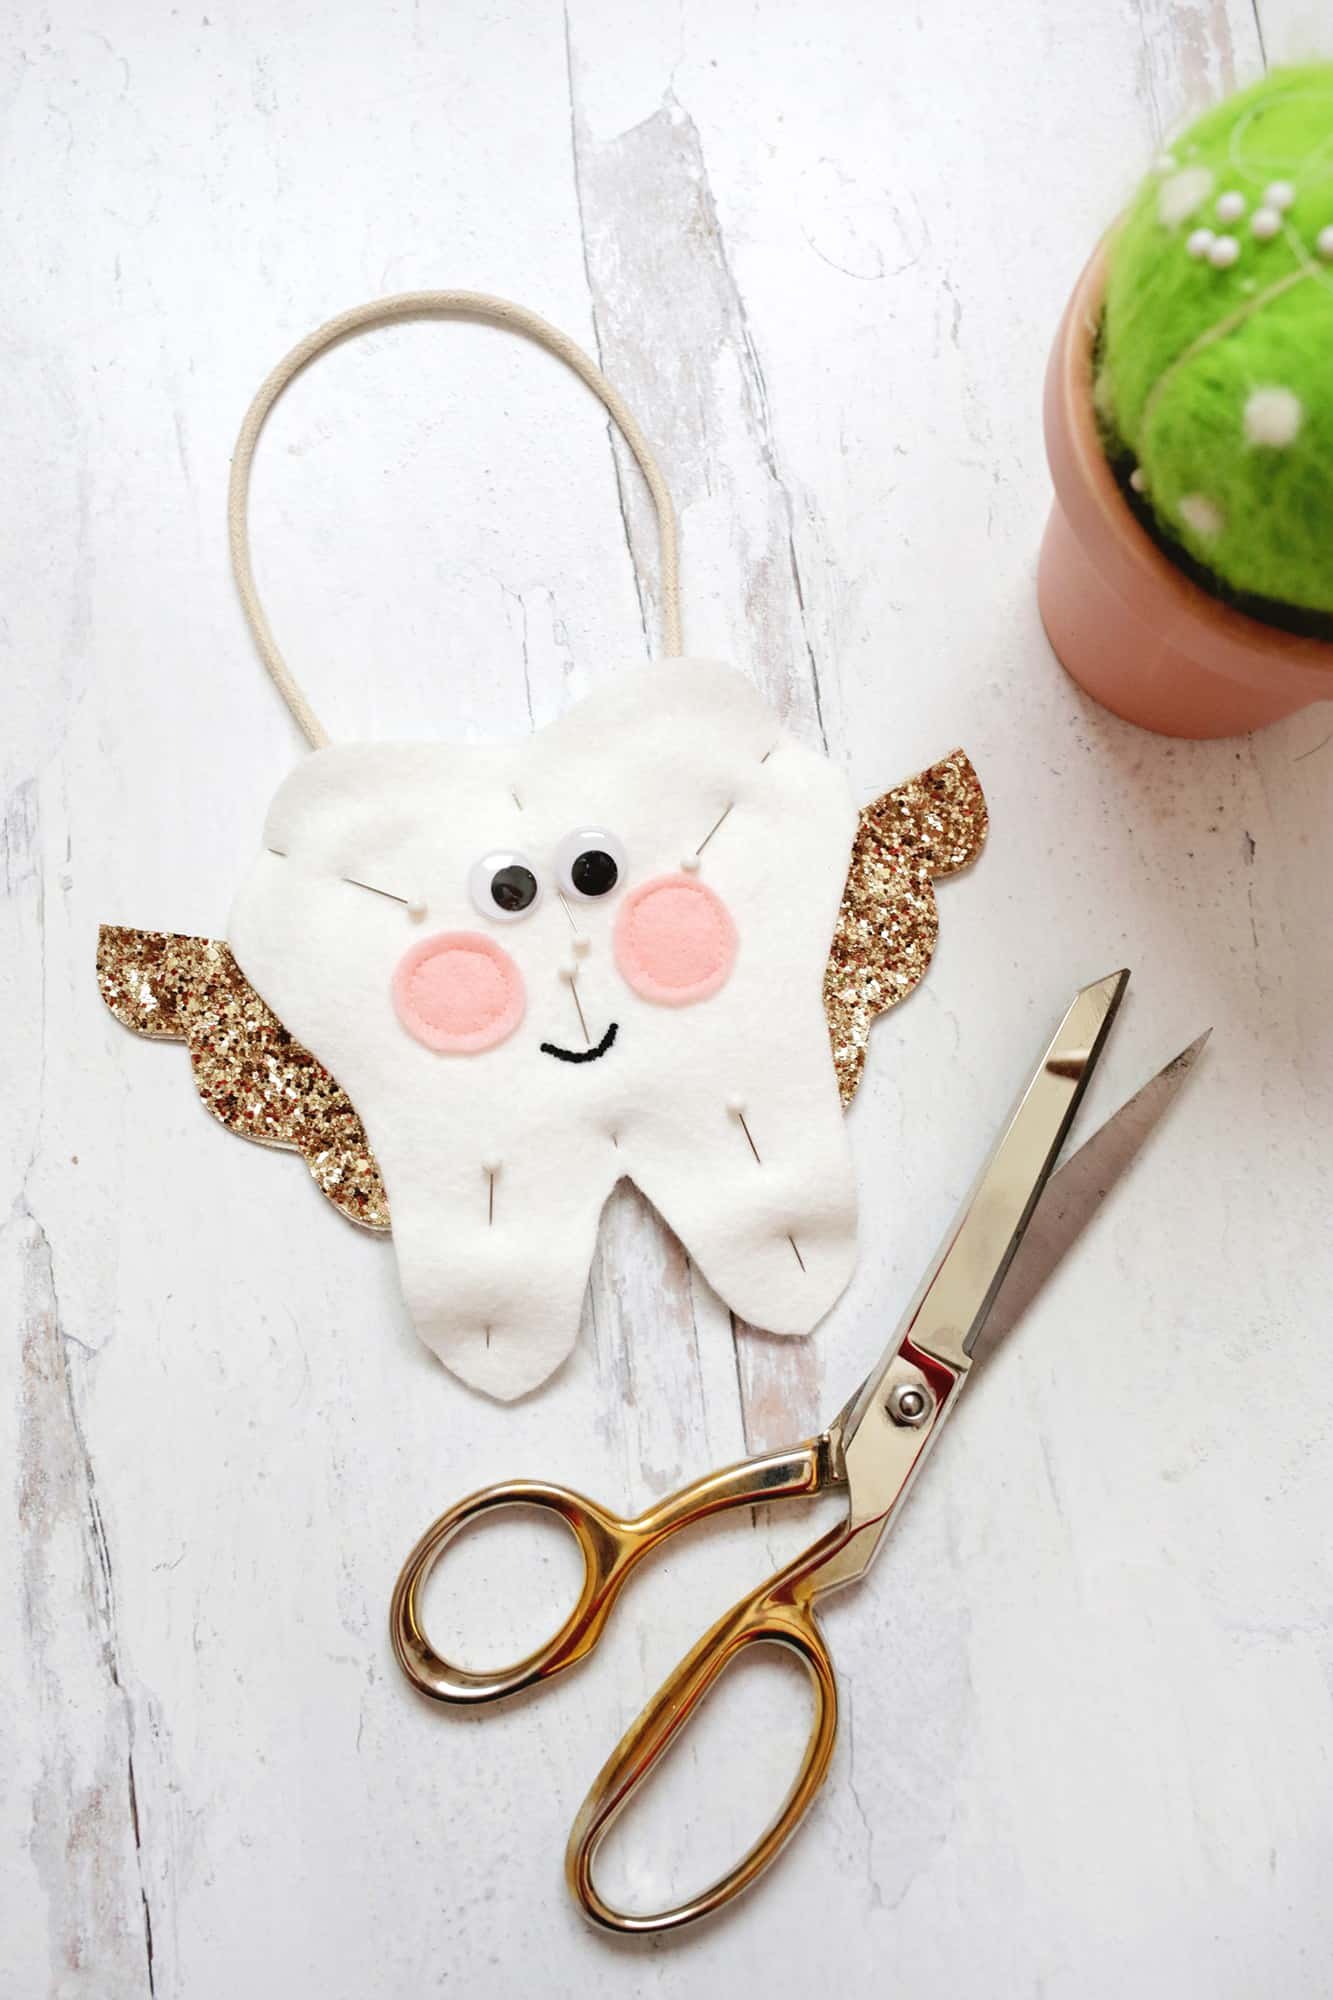
Place your top piece with the face on top of the batting, face side up. If you are using a hanger, slip the ends of your ribbon/rope in with the batting in the middle of your pillow sandwich and use straight pins to pin it all together.
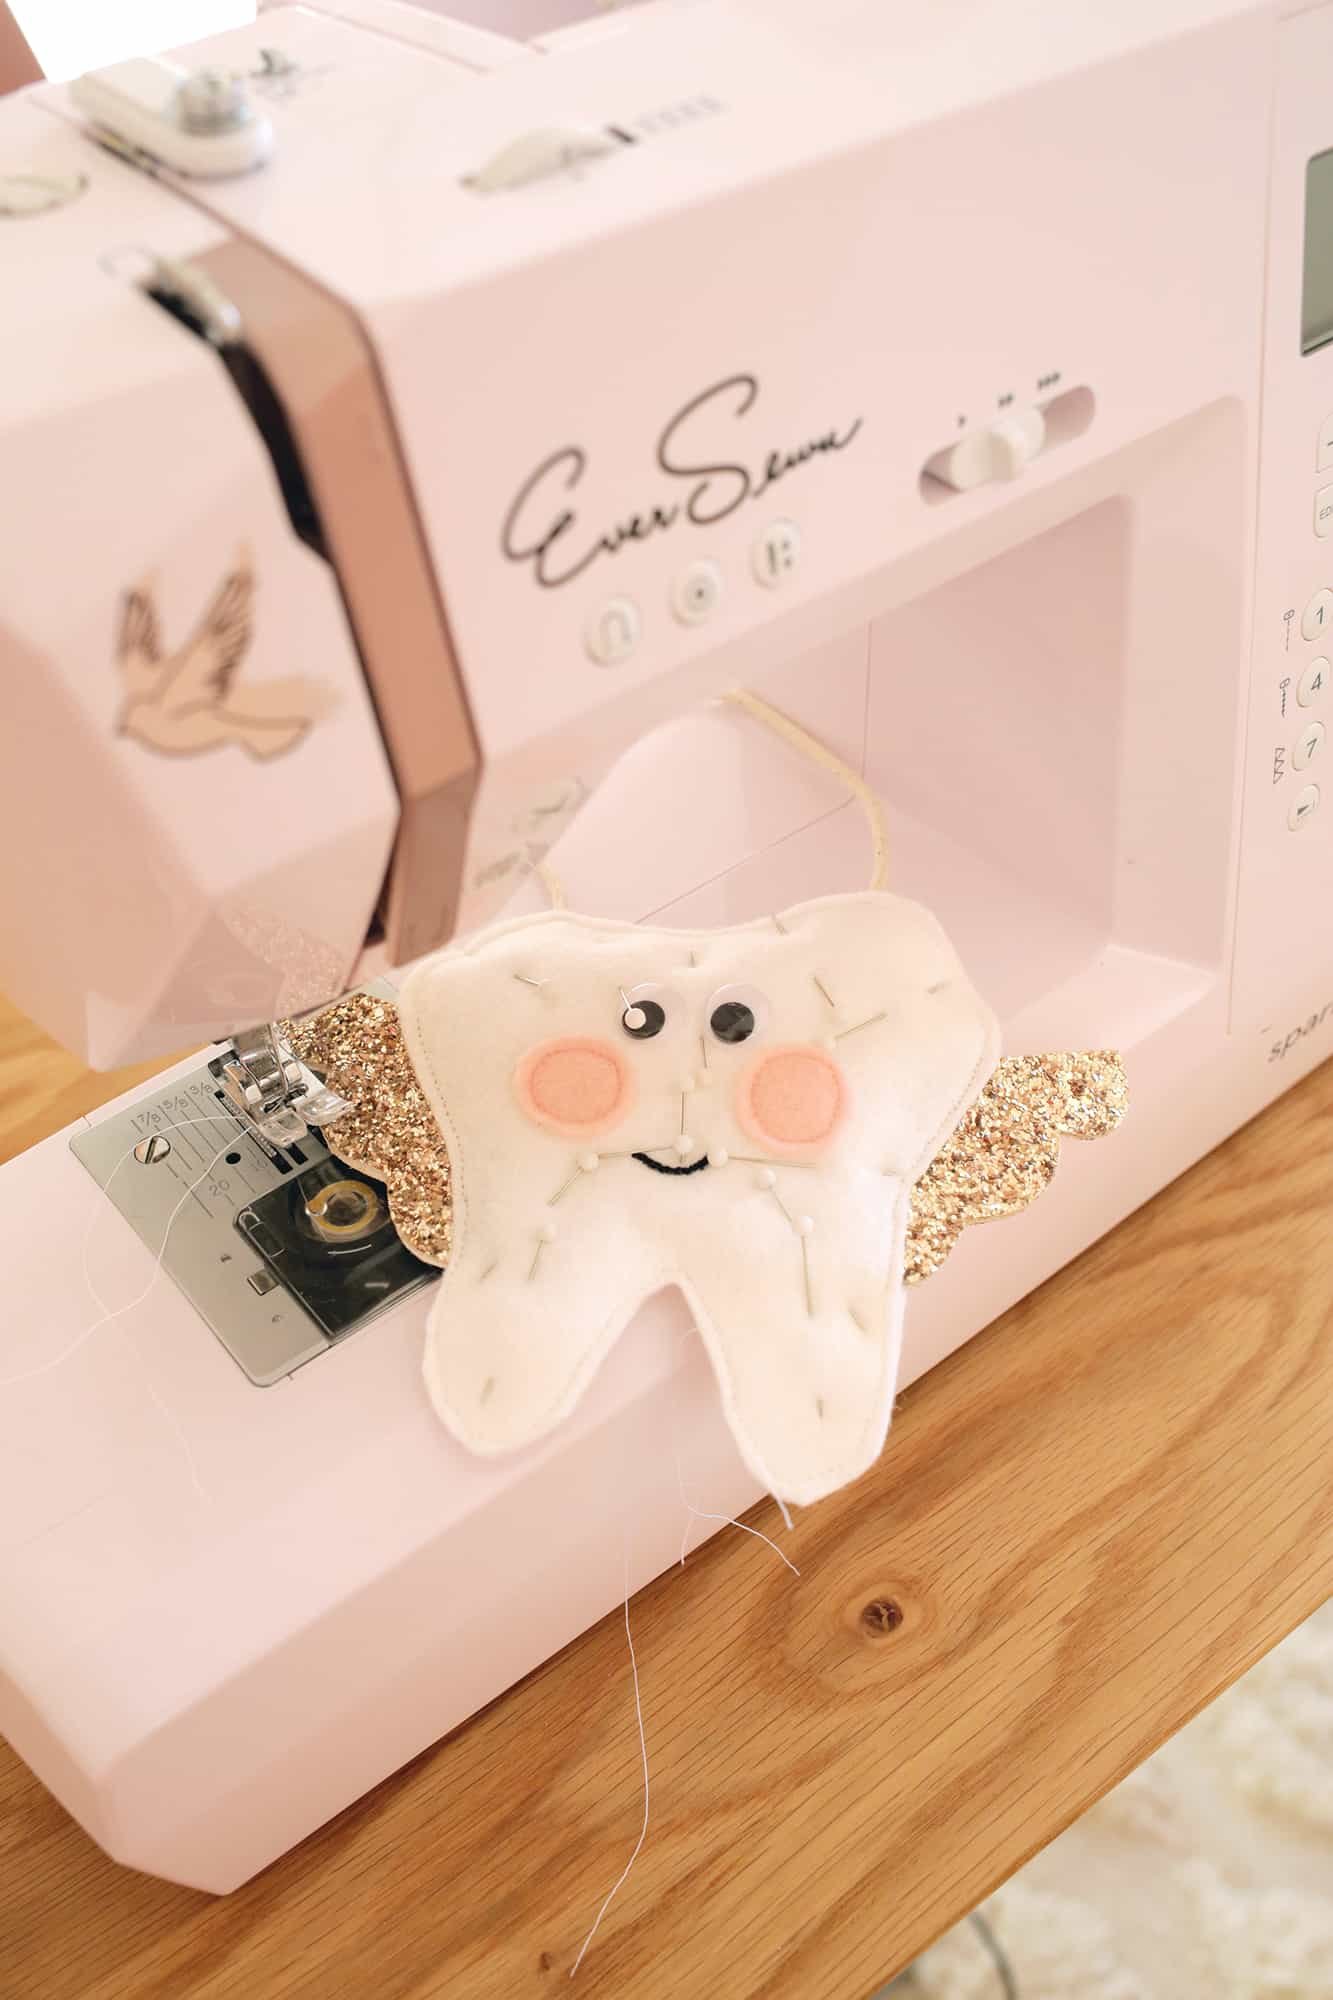
To sew the pillow, sew all the way around with white thread with a 1/4″ seam allowance. For the no-sew option, glue all the way around the edge between the front and back with fabric glue to seal up your pillow edges (you can pin it together while the glue dries to keep it from moving).
Glue your two crown pieces together, glitter sides facing out.
All you have left to do is to glue on your crown and your pillow is ready to use!

1 / 2 / 3 / 4 / 5 / 6 / 7 / 8
I was so happy to have this cutie pillow done in just one afternoon (and Lola loved it when I showed it to her!) and it feels great to know it’s ready and waiting as her tooth gets looser every day.
There are so many fun things you can do with the Tooth Fairy and I love these little baby tooth boxes to keep them in as a keepsake, and these printable Tooth Fairy receipts that you can leave with the prize.
Hope your little one loves this as well! xo. Laura
Love to make DIYs for kids? Check out these projects in our kiddo archives:

How to Make a Tooth Fairy Pillow (Free Printable With a No-Sew Option!)
Tooth-shaped pillow to use when baby teeth fall out!
Cook Time 1 hour 30 minutes
Total Time 2 hours 10 minutes
felt
in white and pink
Free Tooth Fairy pattern download
fabric glue
straight pins
black embroidery thread
or paint pen for no-sew
small rope or ribbon for hanger
batting or pillow stuffing
google eyes
glitter fabric
Print our your pattern download and cut out two teeth shapes from your white felt and two round circles and your pocket piece from your pink felt. Cut out your wing and crown pieces from your glitter fabric as well.
Either sew with pink thread (or glue for no-sew) your pink round cheeks onto the face of your Tooth Fairy. To sew your mouth, use a thin marker to draw a smile and then embroider the line either by sewing little vertical lines all next to each other along the pen mark to make a smile or by using a method like this one. For no-sew, use a black paint pen to draw it on and allow the paint to dry!
Make sure when you cut your wings to trace them facing one direction and then flip the template horizontally to trace it again the opposite way so the glitter is facing the right directions when you go to attach them together. Set your wings aside for a moment.
Glue on your google eyes or you can embroider a different style of eye that you like or even use buttons for the eyes!
For the back of the pillow, center your pocket on the back and either sew along the half circle line, leaving the top open to be your pocket, or glue along that line, leaving the top open for no-sew. You can also add a ribbon or trim detail across the top like I did.
For the wings, take your two sets of wings, and line up the outer edges of each pair with the glitter sides facing out, gluing them together with fabric glue. You’ll notice that the front piece of your wings is a little wider on the inner edge so you have a strip of fabric that will get sandwiched between your front and back pieces and keep the wings in place.
If you are using a hanger, cut a piece of ribbon or thin rope about 10″ long.
Now it’s time to assemble! Place your wings so that you see the exposed inner strip facing up and add fabric glue to those exposed strips. Place your back Tooth Fairy pillow piece on top of the glued strips to connect the wings to that back piece. Allow the glue to dry. Flip the back and wings over so it’s facing down and add some batting or a small amount of pillow fill to the middle of your pillow (I found it easiest to cut a few layers of batting about an 1″ smaller than my tooth shape to be the filling).
Place your top piece with the face on top of the batting, face side up. If you are using a hanger, slip the ends of your ribbon/rope in with the batting in the middle of your pillow sandwich and use straight pins to pin it all together.
To sew the pillow, sew all the way around with white thread with a 1/4″ seam allowance, and for a no-sew, glue all the way around the edge between the front and back with fabric glue to seal up your pillow edges (you can pin it together while the glue dries to keep it from moving).
Glue your two crown pieces together, glitter sides facing out.
All you have left to do is to glue on your crown and your pillow is ready to use!