

I love the look of wallpaper. I don’t, however, love the cost of wallpaper or how semi-permanent it is. Even the more affordable options are generally more than I want to spend, and I’d rather put that towards a cool chair or light fixture for a room than spend it all on the walls.
Thankfully, there’s a super affordable way to hack your own wallpaper, and I’ll show you the different ways to make it work for you based on your budget, skill level, how much you want to personalize it, and the amount of time you want to commit to it.
OK, the big budget-friendly hack to wallpaper is … removable wall decals! Easy to put up and take down yourself so you save on install and removal costs, and the actual material is much more affordable as well!
Choose your wall decal route based on the following options …
Budget:
Just like anything in life, you can decide if you want to spend more or less on your wall decals. The “more” end of the scale will still usually be quite a bit less than wallpapering (especially if you have to also pay someone to install the wallpaper), but even in this category, there are ways to splurge and save.
You’ll pay more for decals that are already cut and ready for you to put up (like these and these) than you will if you cut your own from rolls like this or this. You can also stretch a budget by simply spreading out the decals further apart than you see in the example photo so you can cover more square footage for that amount of money.
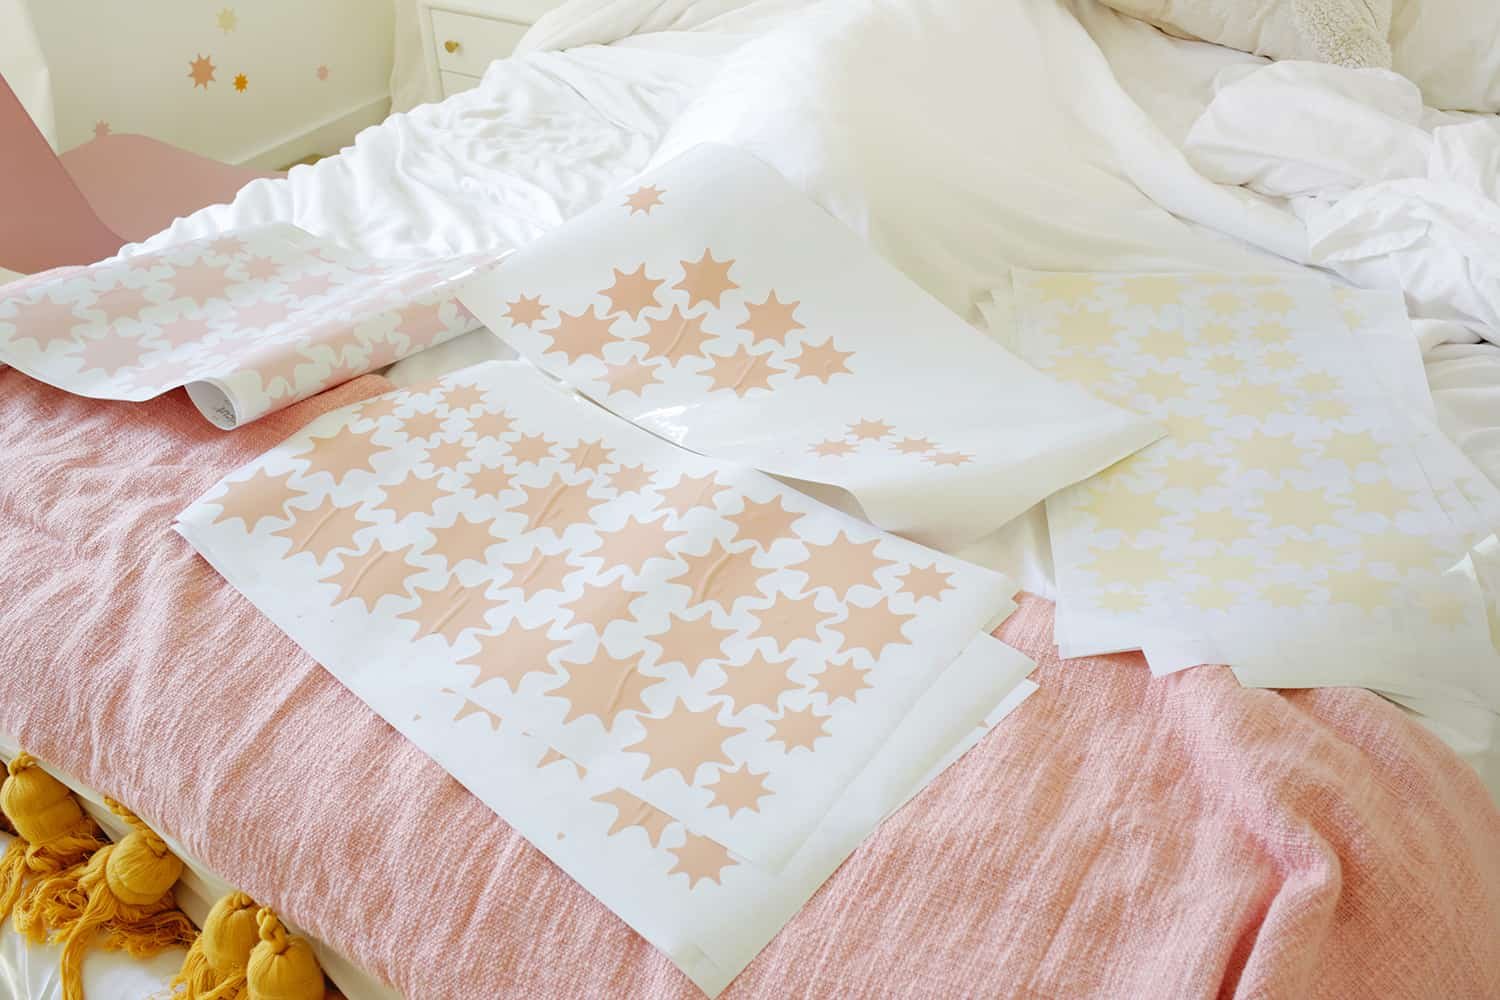
If you decide to buy your own vinyl rolls to cut yourself, you can either choose a design that can be cut by hand (tedious but possible depending on the design and you can recruit help as needed!) or you can invest in a cutting machine like this if you don’t already have one (and you can cut all the decals you want in no time).
It may not be worth buying a cutting machine for just one small room or one wall of decals (unless you also want to use it for its other features as well, like for making cards and T-shirts, etc.), but I’ve used my machine to make wallpaper for four rooms now in addition to other projects, so it’s been really worth it overall.
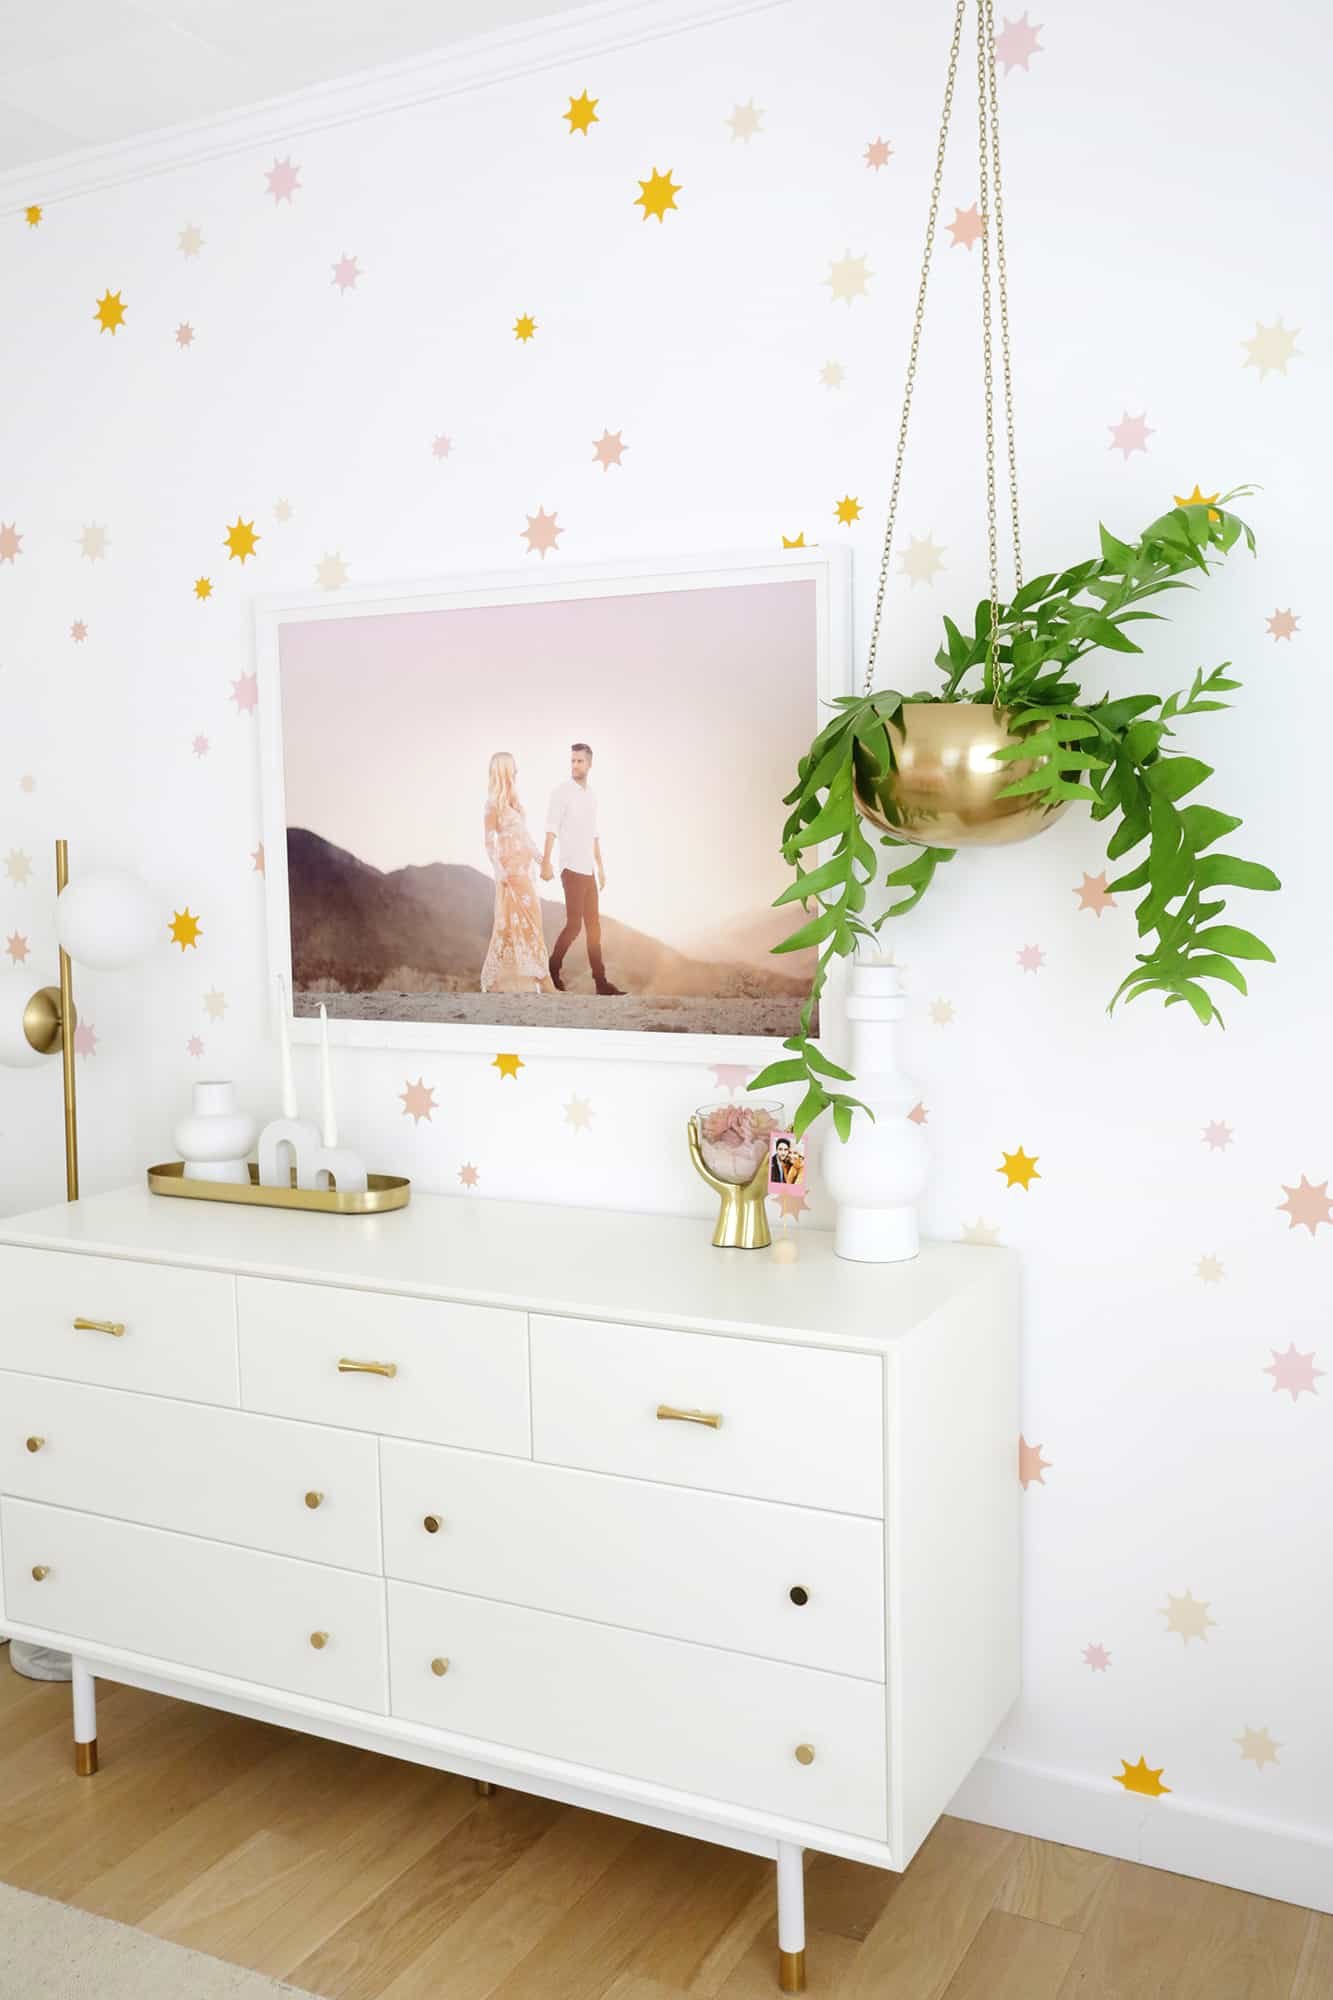
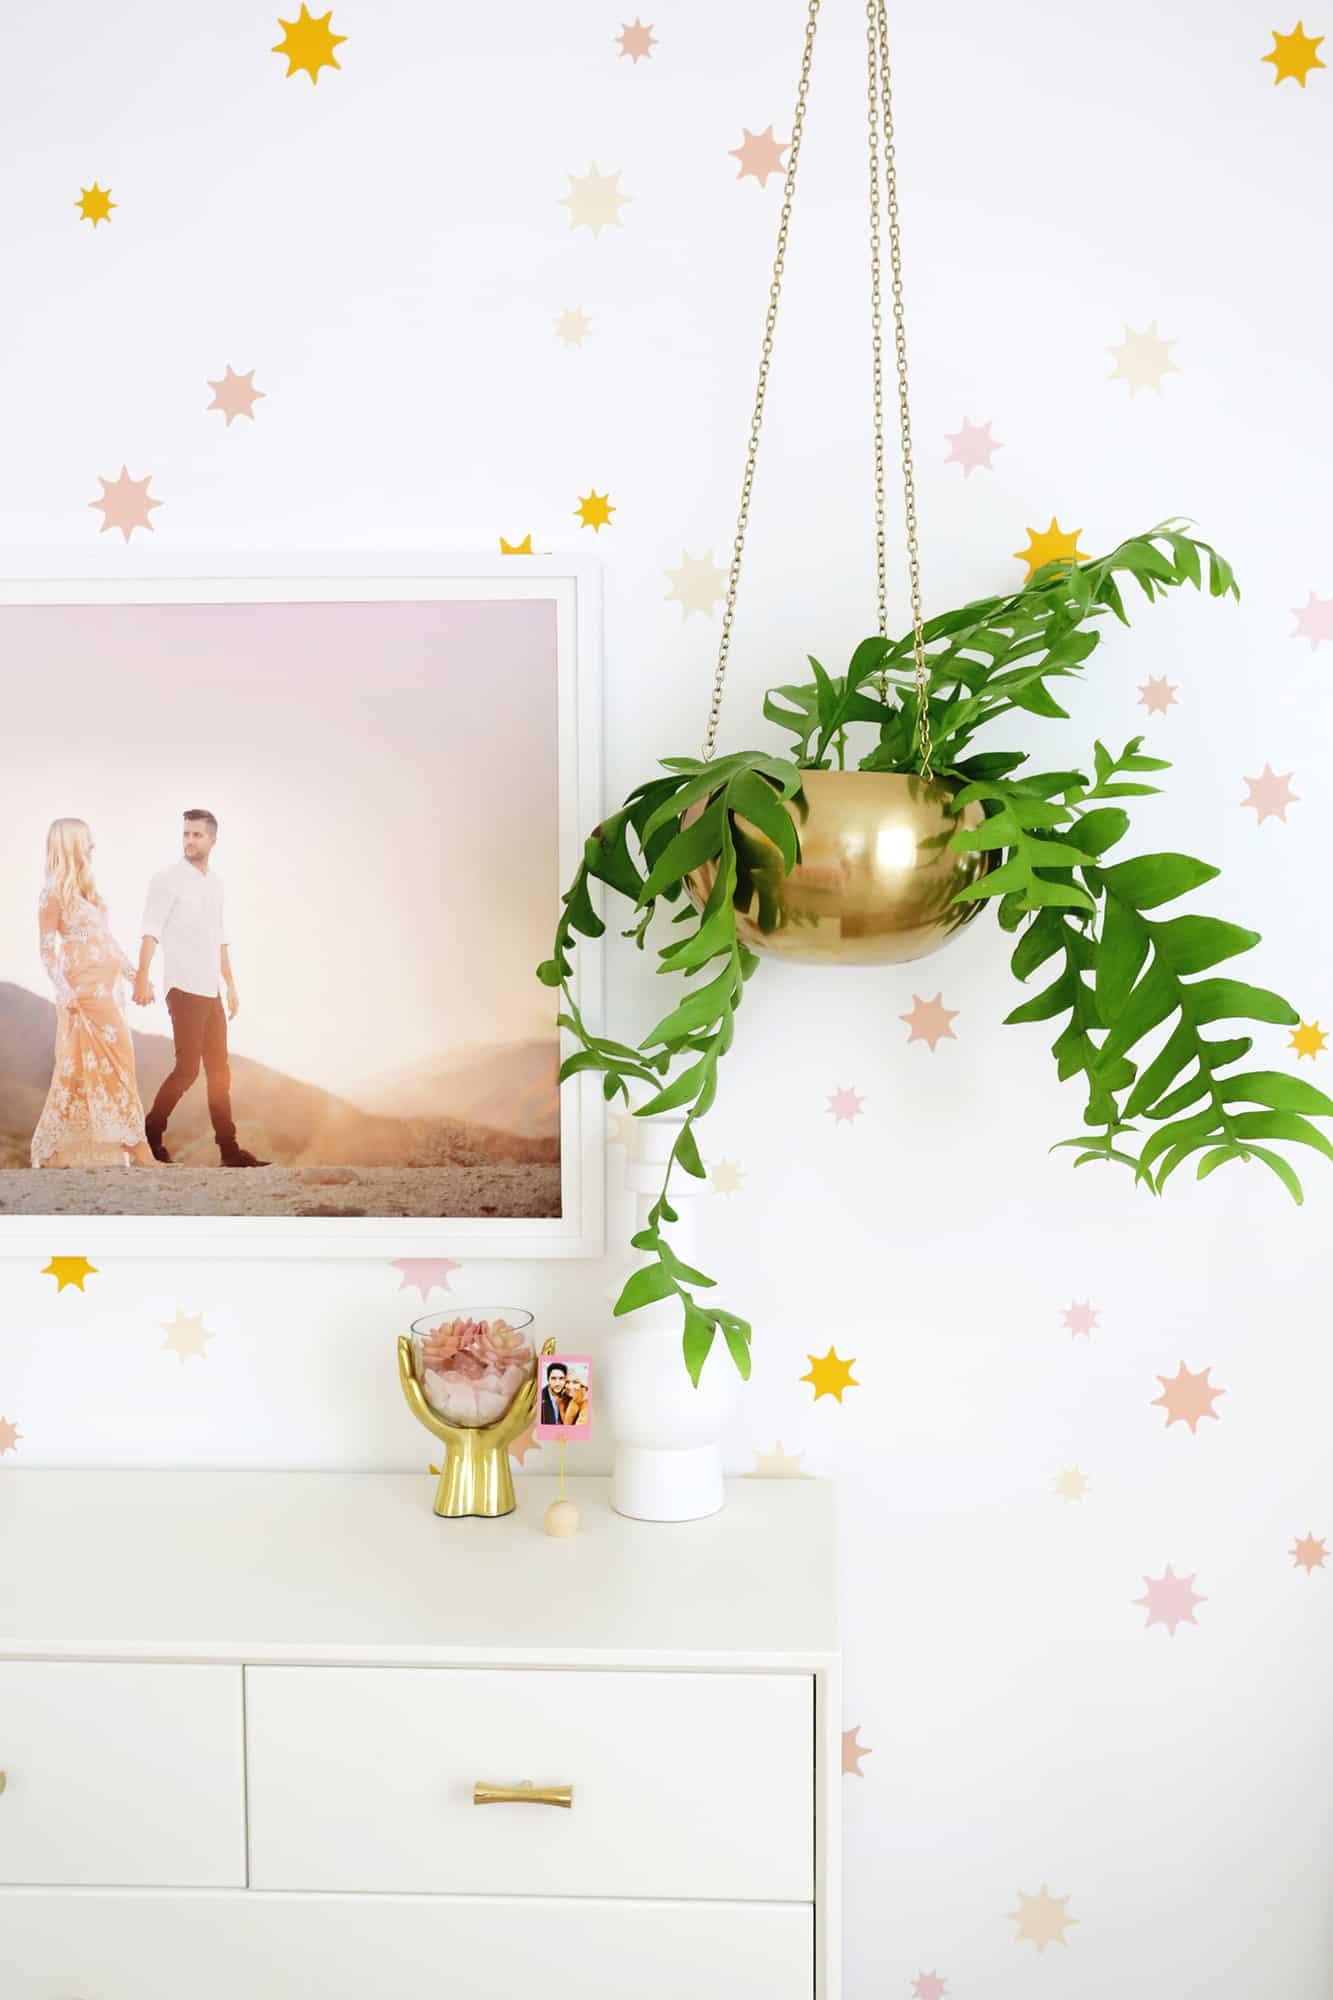
For example, I used around three rolls of each color for the stars in my bedroom, with the colors cream, melon, tulip, and signal yellow, and since I waited for a sale, I spent under $50 on the vinyl to wallpaper an entire room—NOT BAD!
I did use a cutter that I own to cut the shapes, but I could have also chosen a more organic design to cut with scissors instead if I didn’t have a cutting machine or want to buy one.
Skill Level:
When talking about DIY projects, skill level is always a big part of what a person may choose to take on. For decal wallpaper, it’s a pretty broad range of skill level options, so you can choose what works best for you!
Easiest: Buy pre-cut decals (like these) and stick them on your wall!
Medium: Buy your own vinyl and cut out an easy shape with scissors to stick on (think dots, confetti shapes, or more organic looking leopard-type spots).
Advanced: Use a cutting machine and computer software to create a design and have the machine cut it for you. This method is for sure easier on the hand muscles than cutting out shapes yourself, but you do have to take the time to learn how to use the software, etc. Totally doable and worth it if you ask me!
Check out our other wall decal DIYs!
Personalization Level:
If you don’t see exactly what you want already for sale, if you buy decals on Etsy, you may be able to ask the seller to do something special for you if they are flexible and don’t have exactly what you want.
One reason I like the cutting machine method is that I was able to totally pick the shape, size, and color scheme I wanted and the only limiter was the color selection of vinyl I could find. But, other than that, it was all up to me!
So, if you are a little more open to what’s already available, you can go with an option that exists. But if you need to match something existing in your home, or are just super picky like me, you may want to do an option you can customize a bit more.
Time Commitment:
Trying to get this done quickly or do you have more time to spend on it? Ordering a pre-cut decal will allow you to go straight to the application part and you’ll be done in an afternoon, but you’ll want to set aside quite a bit more time if you are cutting out all the decals by hand (a great activity to do while you watch movies).
Using a cutter means that you’ll spend time on the front end getting your design set up and ready to start cutting, but once it’s ready your only job is to load the vinyl into the cutter every so often and let it do its job.
Need some tips on applying wall decals to create a wallpaper look? Check out my tips in this post!
What’s an even more budget-friendly DIY wallpaper hack? Painted wallpaper like …

1 / 2 / 3 / 4 / 5 / 6 / 7 / 8
In case you are wondering, it took me maybe two hours by myself to put up all the decals in my room. A few podcast episodes later, and boom, it was done. I’ve also taken off these types of decals after even a few years and they removed like a dream with no damage, so it’s great for renters as well!
Also, so far I’ve mostly used these decals on white walls, but that’s more a coincidence and you can use them on any color wall you want! The only exception is if you use a very light colored thin vinyl on a dark wall, it may darken the color the vinyl appears just a bit, but that’s kind of the worst that would happen.
Hope this DIY wallpaper idea gives you a more budget-friendly way to wallpaper a room so you can put that savings towards something else! xo. Laura

Super Affordable DIY Wallpaper Hack
How to DIY wallpaper using removable decals
removable vinyl decals
removable vinyl rolls
BUDGET: Just like anything in life, you can decide if you want to spend more or less on your wall decals. The “more” end of the scale will still usually be quite a bit less than wallpapering (especially if you have to also pay someone to install the wallpaper), but even in this category there are ways to splurge and save.
You’ll pay more for decals that are already cut and ready for you to put up (like these and these) than you will if you cut your own from rolls like this or this.
If you decide to buy your own vinyl rolls to cut yourself, you can either choose a design that can be cut by hand (tedious but possible depending on the design and you can recruit help as needed!) or you can invest in a cutting machine like this if you don’t already have one and you can cut all the decals you want in no time.
It may not be worth buying a cutting machine for just one small room or one wall of decals (unless you also want to use it for its other features as well like for making cards and T-shirts, etc.), but I’ve used my machine to make wallpaper for four rooms now in addition to other projects, so it’s been really worth it overall.
For example, I used around three rolls of each color for the stars in my bedroom, with the colors Cream, Melon, Tulip, and this Signal Yellow and since I waited for a sale, I spent under $50 on the vinyl to wallpaper an entire room—NOT BAD!
I did use a cutter that I own to cut the shapes, but I could have also chosen a more organic design to cut with scissors instead if I didn’t have a cutting machine or want to buy one.
SKILL LEVEL: When talking about DIY projects, skill level is always a big part of what a person may choose to take on. For decal wallpaper, it’s a pretty broad range of skill level options, so you can choose what works best for you!
Easiest: Buy pre-cut decals (like these) and stick them on your wall!
Medium: Buy your own vinyl and cut out an easy shape with scissors to stick on (think dots, confetti shapes, or more organic looking leopard-type spots).
Advanced: Use a cutting machine and computer software to create a design and have the machine cut it for you. This method is for sure easier on the hand muscles than cutting out shapes yourself, but you do have to take the time to learn how to use the software, etc. Totally doable and worth it if you ask me!
PERSONALIZATION: If you don’t see exactly what you want already for sale, if you buy decals on Etsy you may be able to ask the seller to do something special for you if they are flexible and don’t have exactly what you want. One reason I like the cutting machine method is that I was able to totally pick the shape, size, and color scheme I wanted and the only limiter was the color selection of vinyl I could find. But, other than that, it was all up to me!
So if you are a little more open to what’s already available you can go with an option that exists, but if you need to match something existing in your home, or are just super picky like me, you may want to do an option you can customize a bit more.
TIME: Trying to get this done quickly or do you have more time to spend on it? Ordering a pre-cut decal will allow you to go straight to the application part and you’ll be done in an afternoon. But you’ll want to set aside quite a bit more time if you are cutting out all the decals by hand (a great activity to do while you watch movies).
Using a cutter means that you’ll spend time on the front end getting your design set up and ready to start cutting, but once it’s ready your only job is to load the vinyl into the cutter every so often and let it do its job.